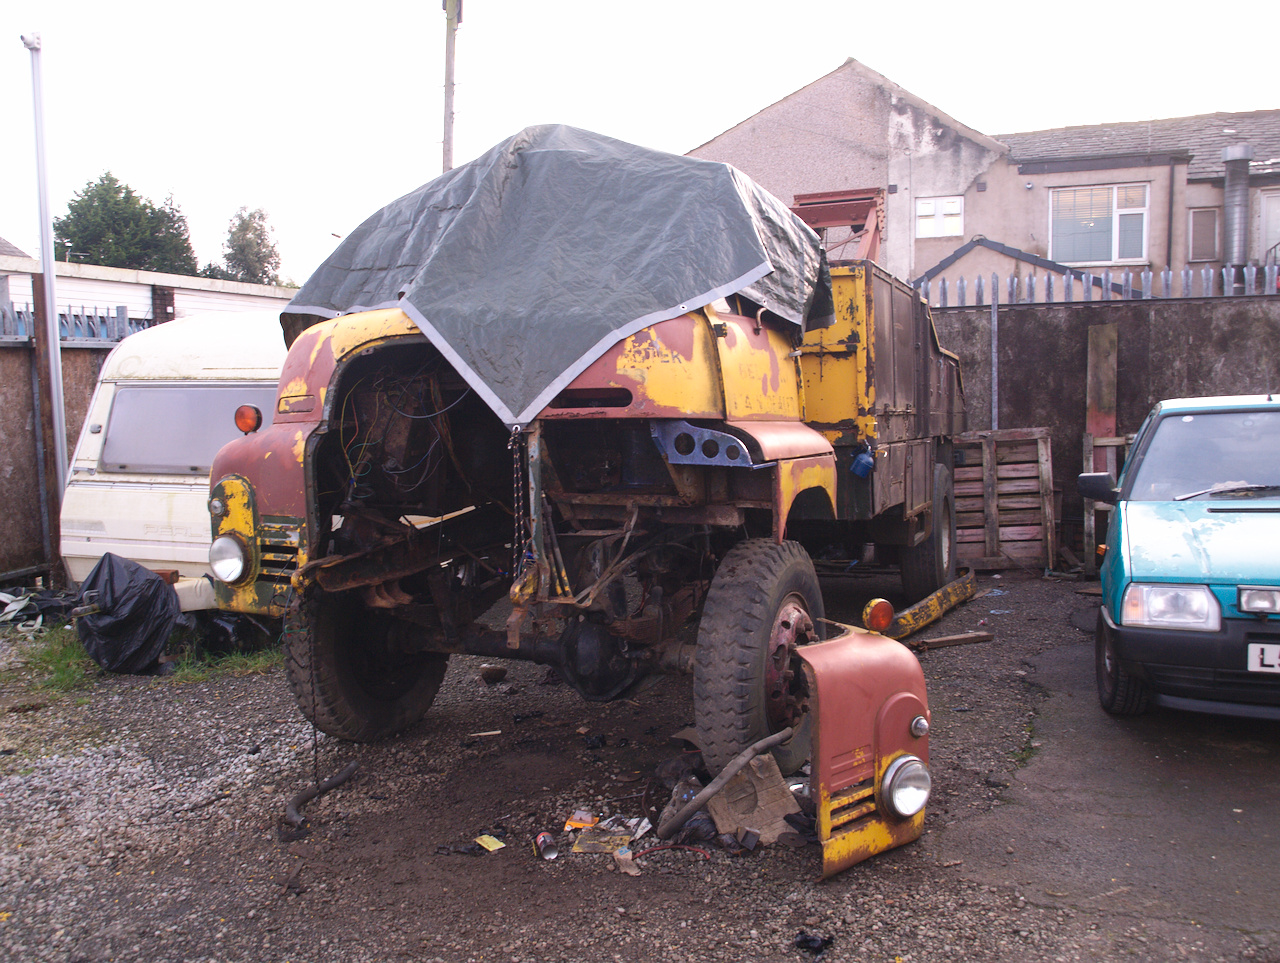
Engine Teardown continues
Right, where was I? Ah, yes, just tearing into the engine and making some wild-ass guesses.
Anyway, it turns out that the 'B' and 'Y' stamped in the top of the piston are the "piston grade", or the size to fit the liner in that cylinder.
| Piston Grade | Piston Size | Liner Bore Diameter |
|---|---|---|
| R | 3.8715 to 3.8720in | 3.8735 to 3.8740in |
| B | 3.8720 to 3.8725in | 3.8740 to 3.8745in |
| Y | 3.8725 to 3.8730in | 3.8745 to 3.8750in |
| W | 3.8730 to 3.8735in | 3.8750 to 3.8755in |
Furthermore, the manual also advises: Where the liner bore is scored or the maximum wear exceeds .010 in. the cylinder liner and piston should be renewed. Reboring or honing of cylinder liners is not recommended, and for this reason oversize pistons are not serviced.
All well and good, when you have a nice big stock of factory parts to
draw upon and you're not modifying anything. 
Which, of course, is not where I'm at.
So I've been doing some measuring and some maths. Some measuring has put the combustion chambers at 120cc or so; and I have calculated that, to get the compression I want (~8.5:1), I need to reduce that to 96.6cc.
So then I had to break out the geometry, and an extra box of head-scratching, to work out -- if I go for following the outline of the combustion chamber, smaller by a margin of 5mm or so all round -- how tall the raised portion on the piston would need to be. (While also maintaining a nice wide margin of safety for piston to valve contact (or piston to spark-plug contact))
In the case that I do go for having pistons made for this, then I expect I'll have them all made up to the diameter for the 'W' piston grade, and have the bores honed out accordingly. All this is subject to change, of course.
Getting away from the noodling and theory side of things:
Footwell vent, on the nearside, as I removed the duct:
...and with the duct removed entirely:
Not so pretty. Not beyond redemption, though. The offside, thankfully, is in much better shape; but will still need some attention.
Following on from that, some other bits "fell off":
Both of those corner panels undo by way of lots of little screws, and the odd nigh-inaccessible nut, that thankfully mostly just undid without putting up much of a fight. The lights on that corner are all wired up with a nice pair of multi-plugs for quick attachment when it's finally ready to go back on. Still have to add a ground lug to the chassis on each side for them to connect to, which isn't strictly needed, since it does ground via the panel itself; but why not add a proper lug to guarantee a good connection while I have it all apart?
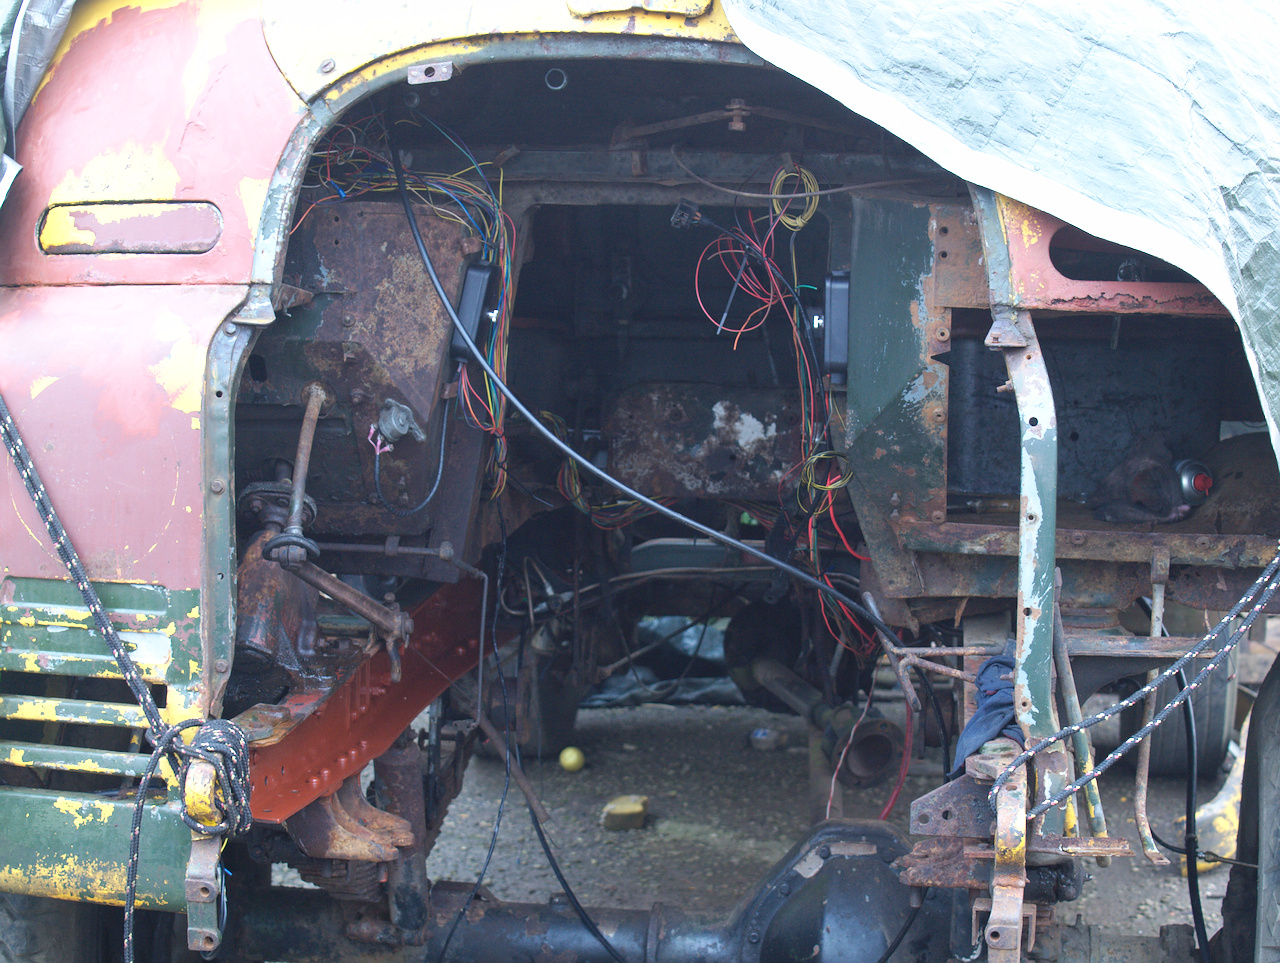
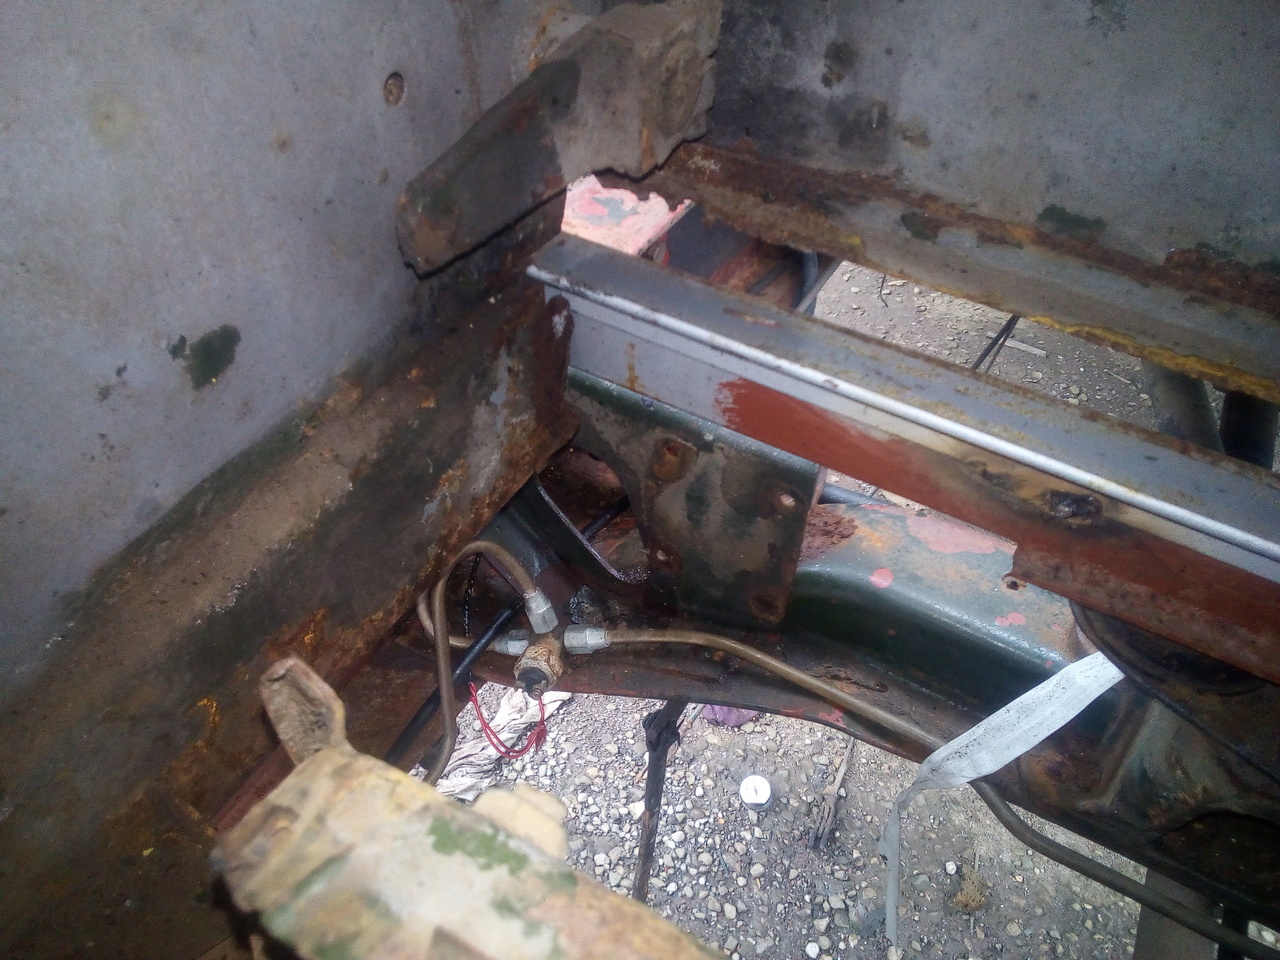
Anyway, it'll be a while before that panel goes back on, because having the extra room to sit where the engine used to be and look around while I was working on the wiring let me get a good look at the next bit of fun and joy:
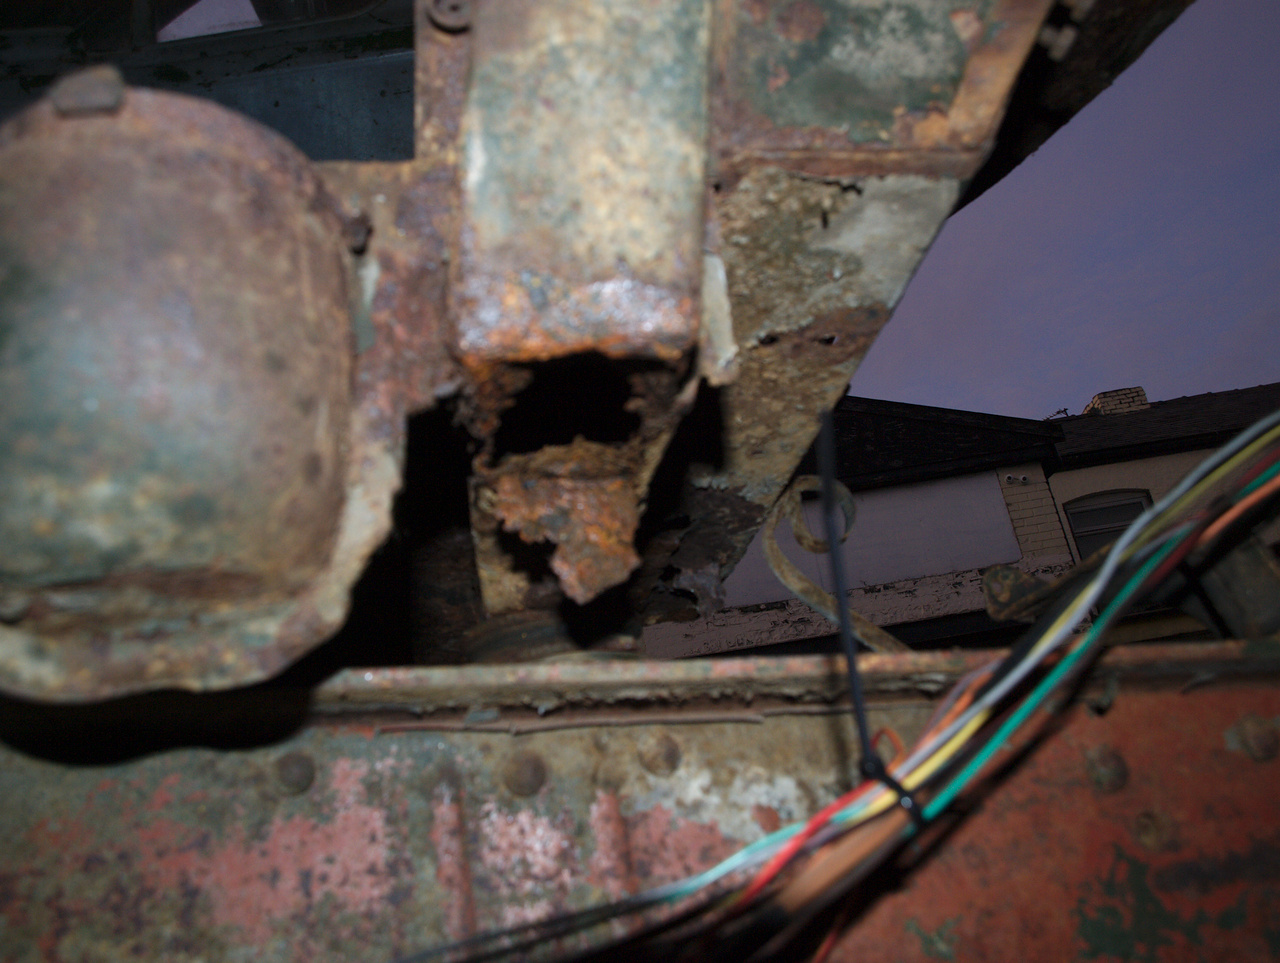
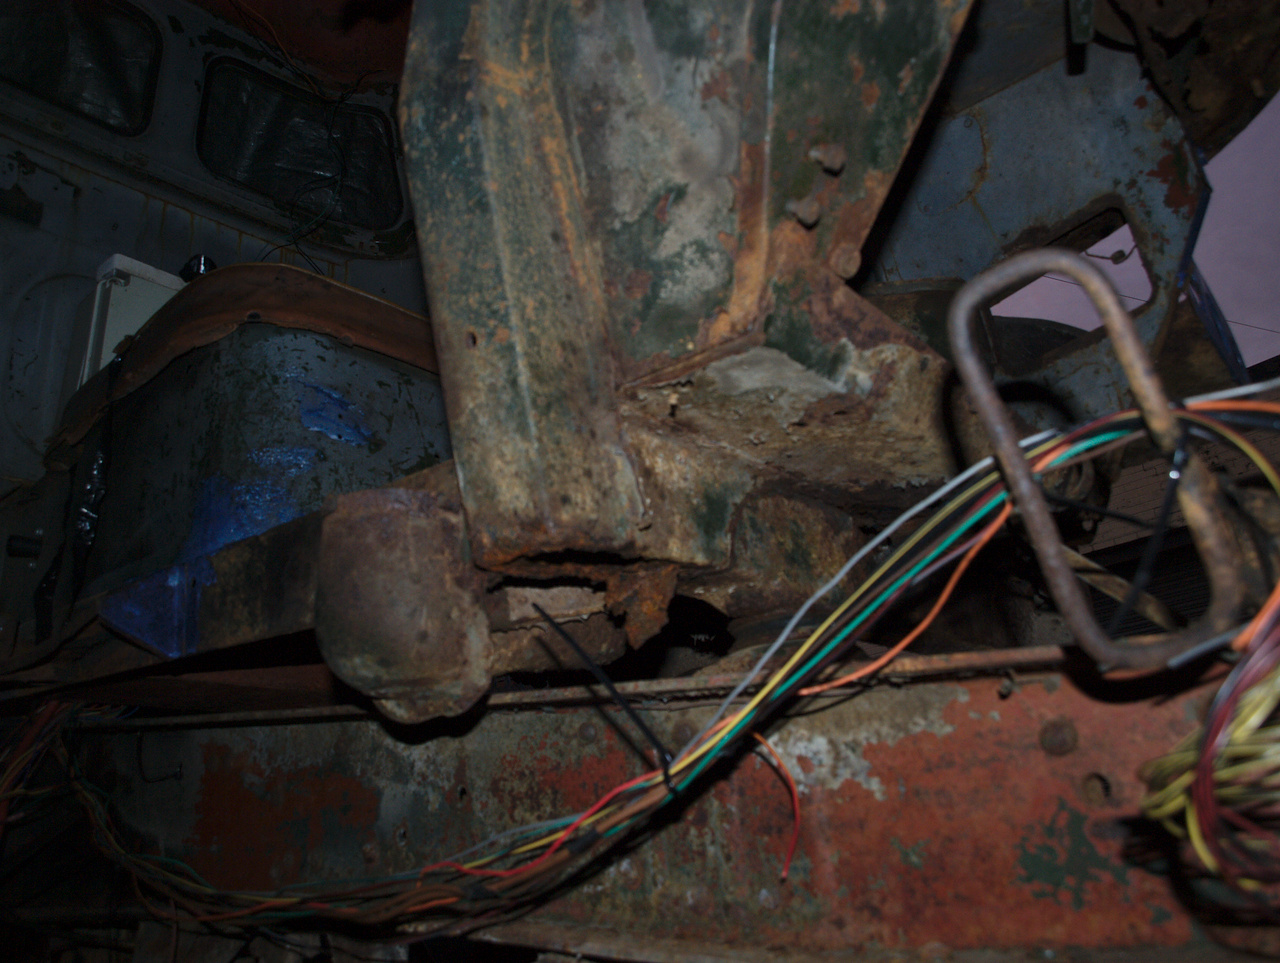

I knew those front cab cross-members were bad, though it's always somehow rather painful to discover just how bad things are. I reckon I'm going to deal with this in a similar way to how I dealt with the rear cab cross-member: Support the cab across the chassis rails, excise the rotten metalwork, and apply sufficient amounts of new metal as to ensure appropriate levels of structural soliditude.
Time -- doing as it will -- passes, and the wiring continues to be chipped away at. In retrospect, I should've left the truck entirely running via bodge-wires up until much later, rather than run half a wiring loom, modify it, add more, take bits away... But it's all part of the learning curve. (Hell, I originally ran the wiring for the O/S headlight down the N/S chassis leg, and across the front cross-member; but now I know better, and it doesn't go that way now.)
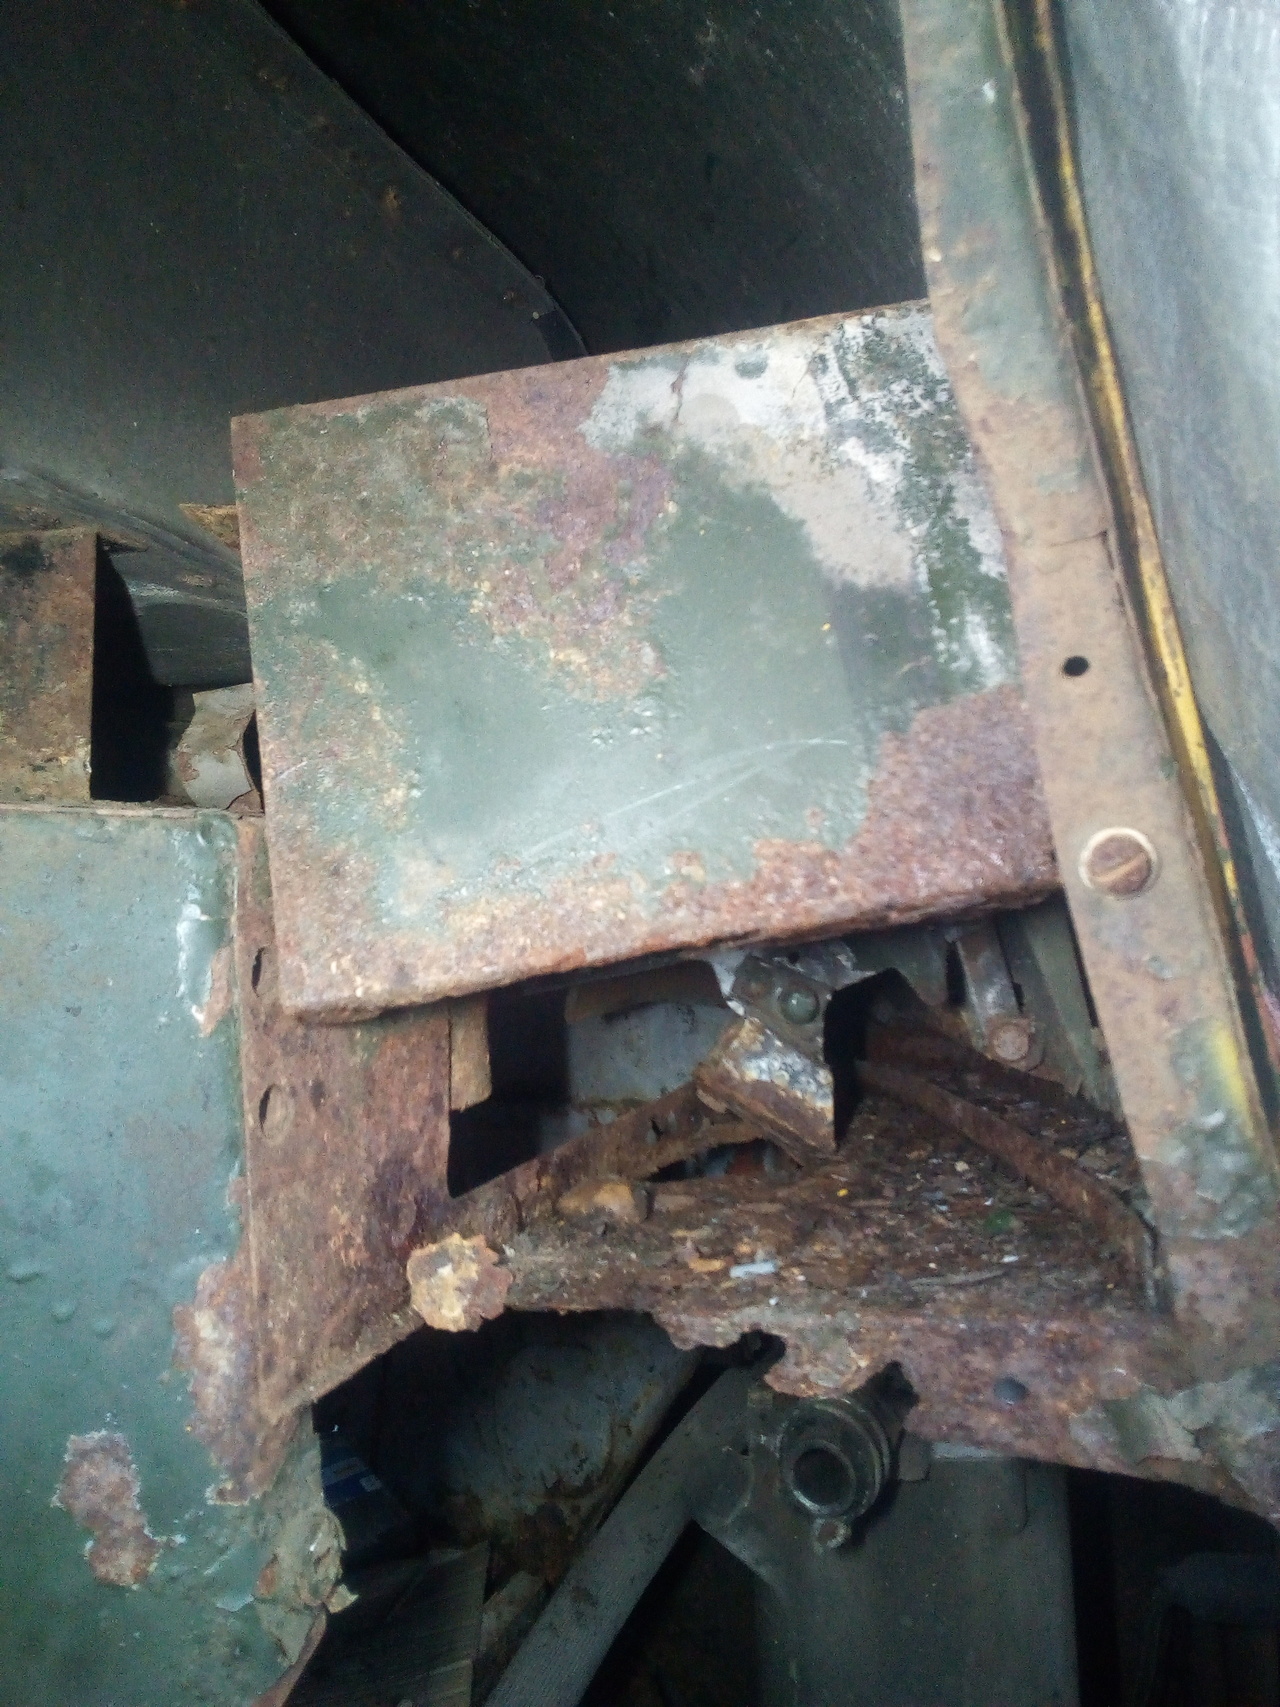
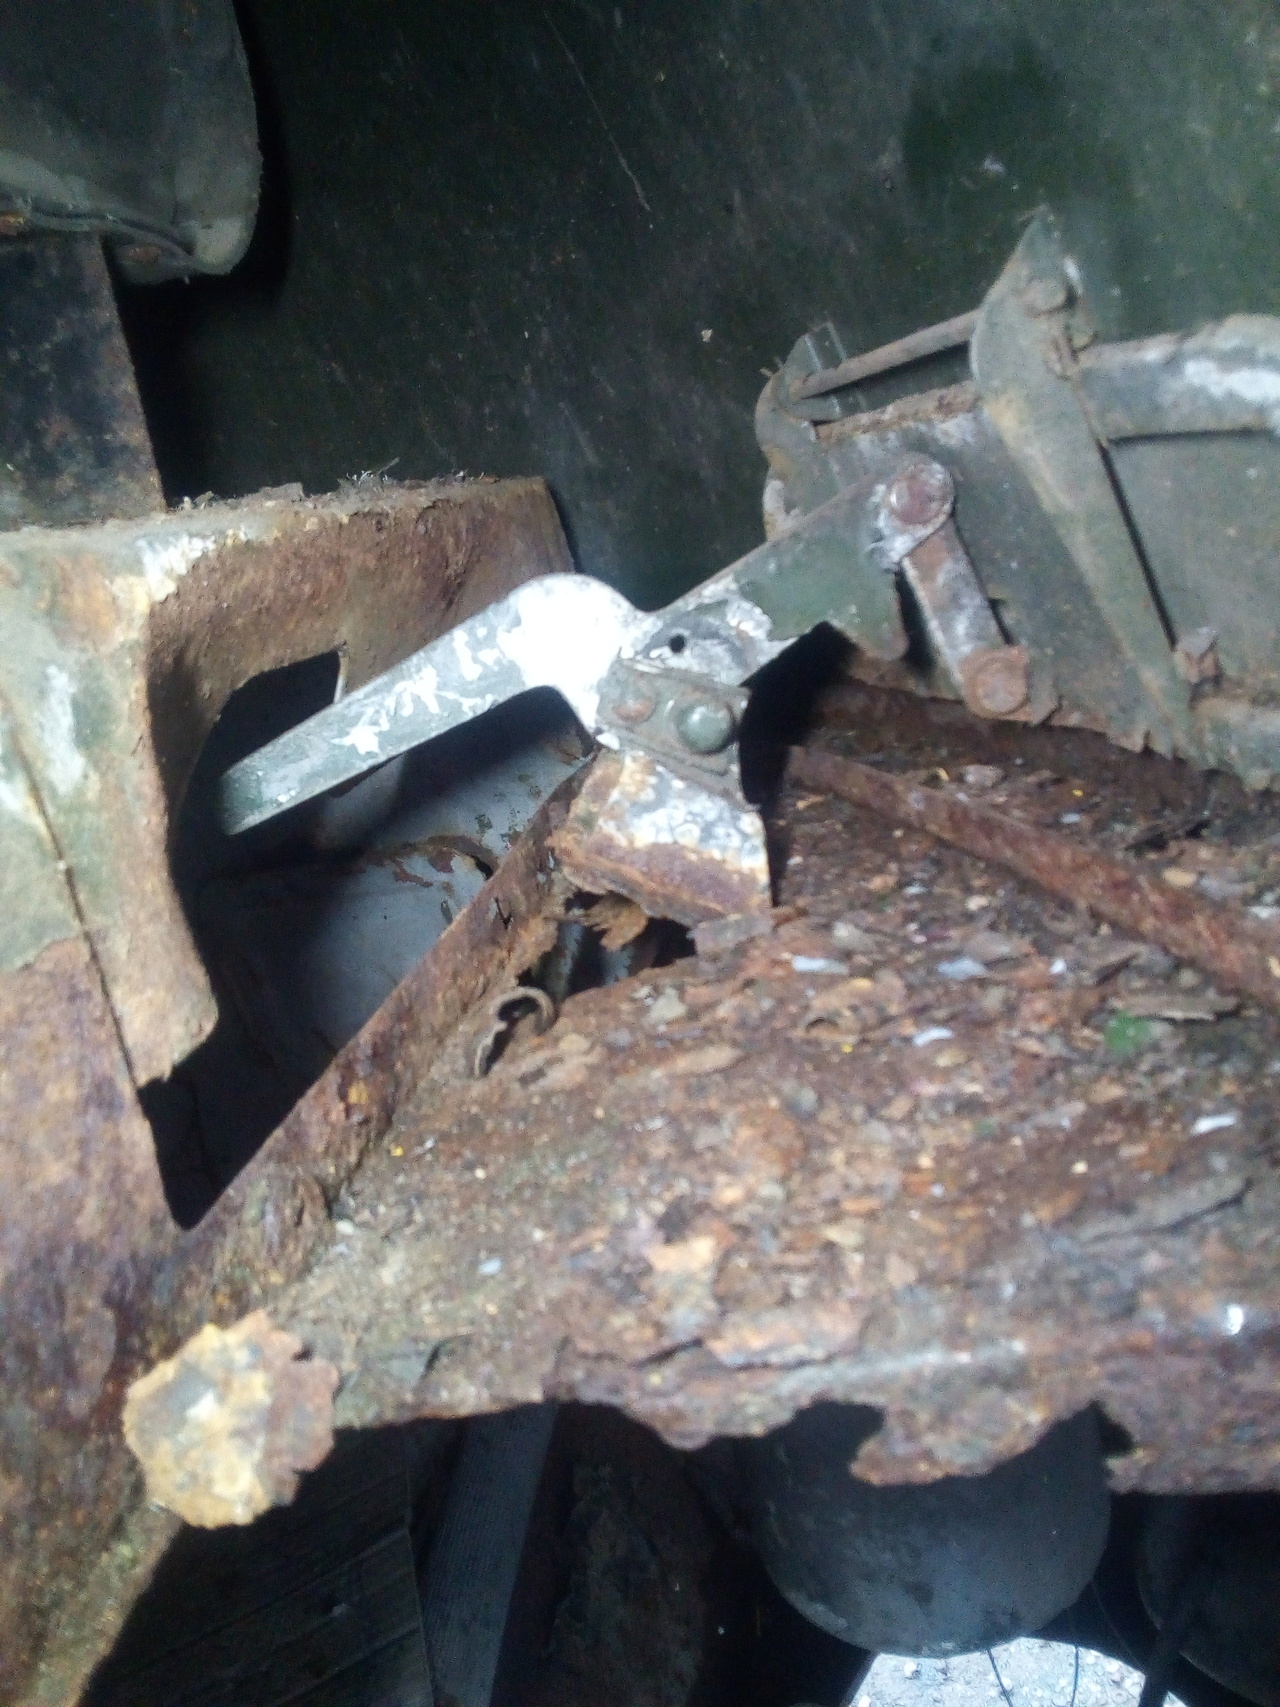
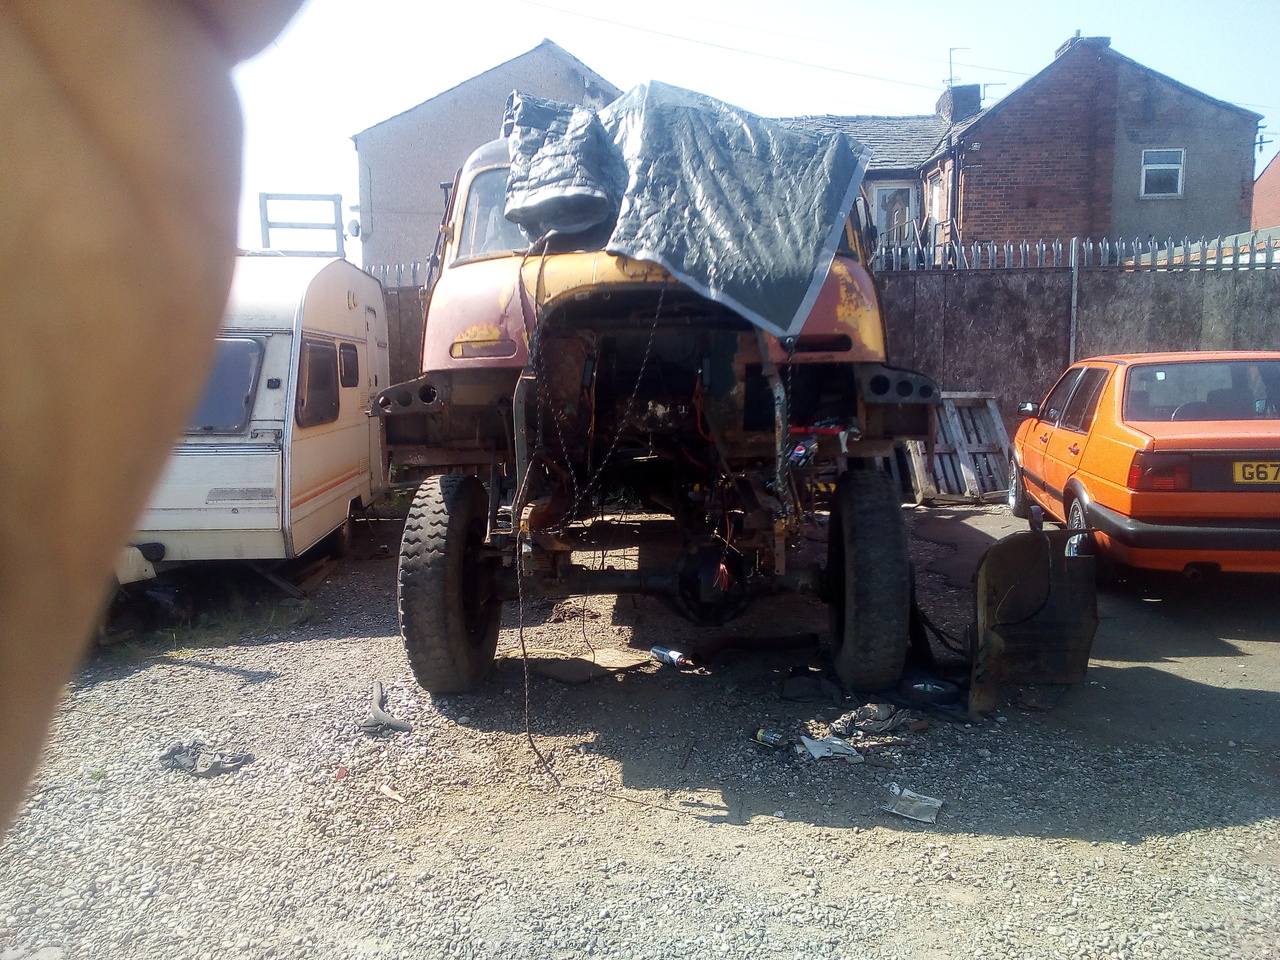
Time, once again, passed in a bit of a blur; and I found myself in March, holding the handbrake and winch brake lever linkage bracket, that came out of here:
Now what on earth possessed me to do that?

Oh, right. Yes. Bracketry

Sins hidden.

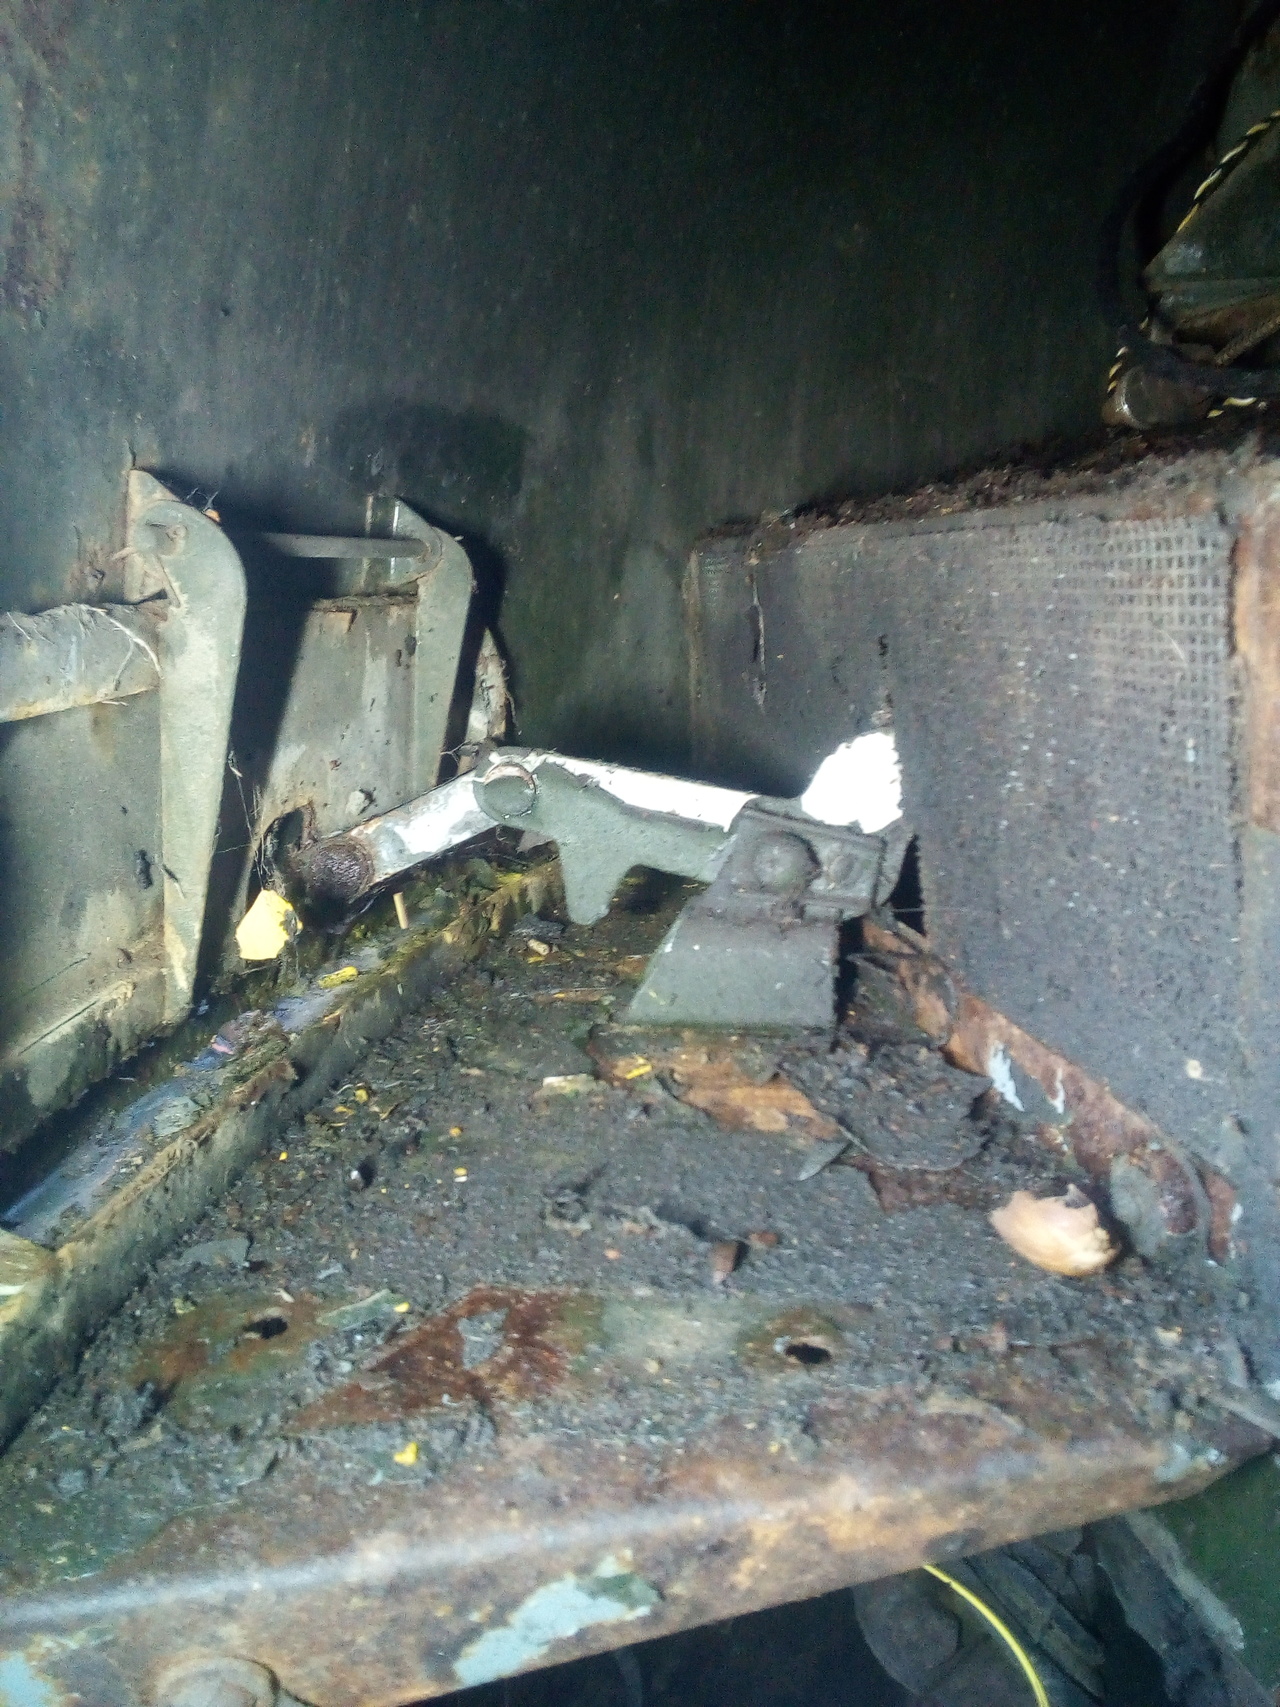
And much the same on the other side, except slightly uglier because my access wasn't as good. None of the wiring was harmed in the process. (This is what I mean about it being in the way...)
Anyway, that brings the rear cab structural member replacement to about 80% completed; to finish up on that part, I need to undo the mounts, lift the cab back up, clean up and properly weld the brackets on the outside of those rails. Then there's some cosmetic tidying and closing in to do at the back end, with maybe little a cavity wax as a treat.
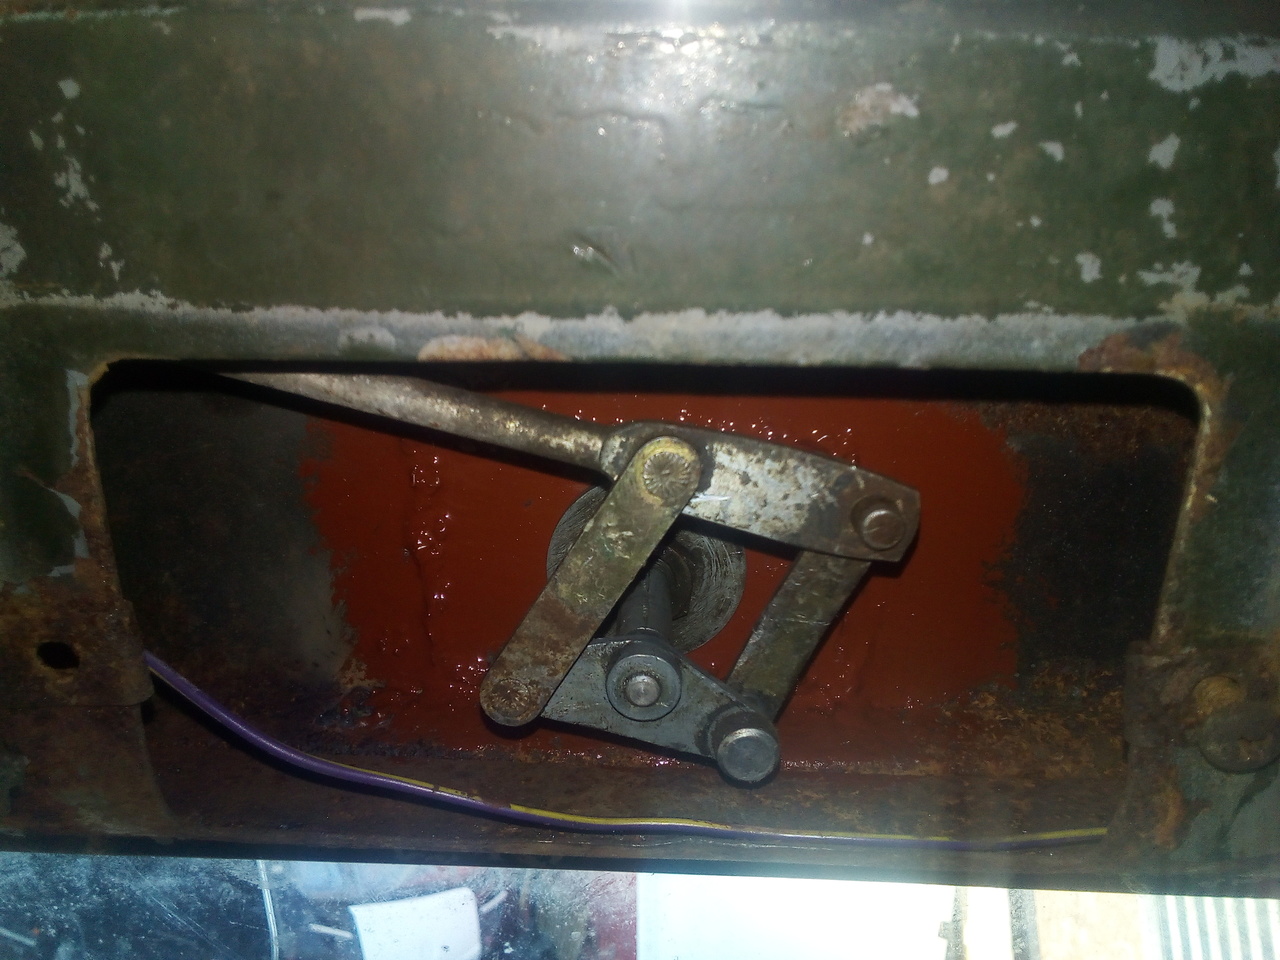
Also, while I was in the area, I tested that brake light pressure switch just for gits and shiggles. It only went and worked. (But I'm missing one of the terminal screws anyway. If I can't find a replacement for that screw, I might just replace the whole pressure switch, it's a pretty standard item.)
Oh, yeah, and I cut another big bit of sheet metal off the back of the cab, so now it's a straight line right the way across compared to the horrible jaggedy mess it was before. Should make it easier to add the new sheet metal back in, when I'm done.

Frankenhealey:
Can't remember if I've said this before (and if you know already, apologies) but when I was looking at this I was told that to increase the compression not to touch the head but to deck the block. Also as they love their Beddys in the Antipodes that there may be some high comp pistons available from Aussie manufacturers.
I think you have mentioned it before, but I don't think I can deck the block far enough to get compression high as I would like. There'd be nothing left of the flange on the liners, and I may well be into the water jacket.
And I've hunted around online and found a couple of catalogues for
pistons from Aussie manufacturers for the Bedford 300, and it seems
like the highest compression they get is 6.9. Which would still be a
bit of a bump, but it's not enough for what I want (Whether or not
what I want is a good idea, is a different matter entirely. ), and
I can't tell what they're starting from. (If they're to boost
compression from the 6.5 head, then they'll be even lower than what I
want, since I have the 6.1 head.)
Still, it's likely to be a while before I get to the actual decision
point (read: the "spending money" point) on that; so I'm going to keep
scratching my head, double-checking my numbers, and checking around to
see if there's anything that comes closer to what I'm looking
for. (But I suspect there isn't; because normal people aren't
hot-rodding this honking great boat anchor. )
dodgerover
Why not weld up the bowl on top of your existing pistons and have it machined to what your require? Also hanging a turbo or supercharger on it would be a good way of making use of the low compression and probably improving fuel consumption..
Zelandeth
Why have I now got the picture stuck in my head of a Bedford 300 engine with the blower from a Detroit 671 grafted onto the side of it...
They're a flat-top piston already, the chamberpot bowl is in the head.
As for the turbo, I'm not going to rule it out entirely, but I have my reasons for now. (More compression helps both N/A and boosted; and figuring out the tuning N/A is likely to be more forgiving to start with. Turbo can come later, if and when I still need more. But not too much more, because I still want to run the factory 4-speed box and transfer-case, and I'd rather not turn those into a heap of shrapnel.)
As for supercharger: There's already too much whirling around the front of that engine as it is.
More conversation occur about rod length, etc.
There's about 12mm between the top of the top ring land, and the piston crown.
But Wait!
..it isn't as easy as just making the rods longer. But I'll get to that shortly.
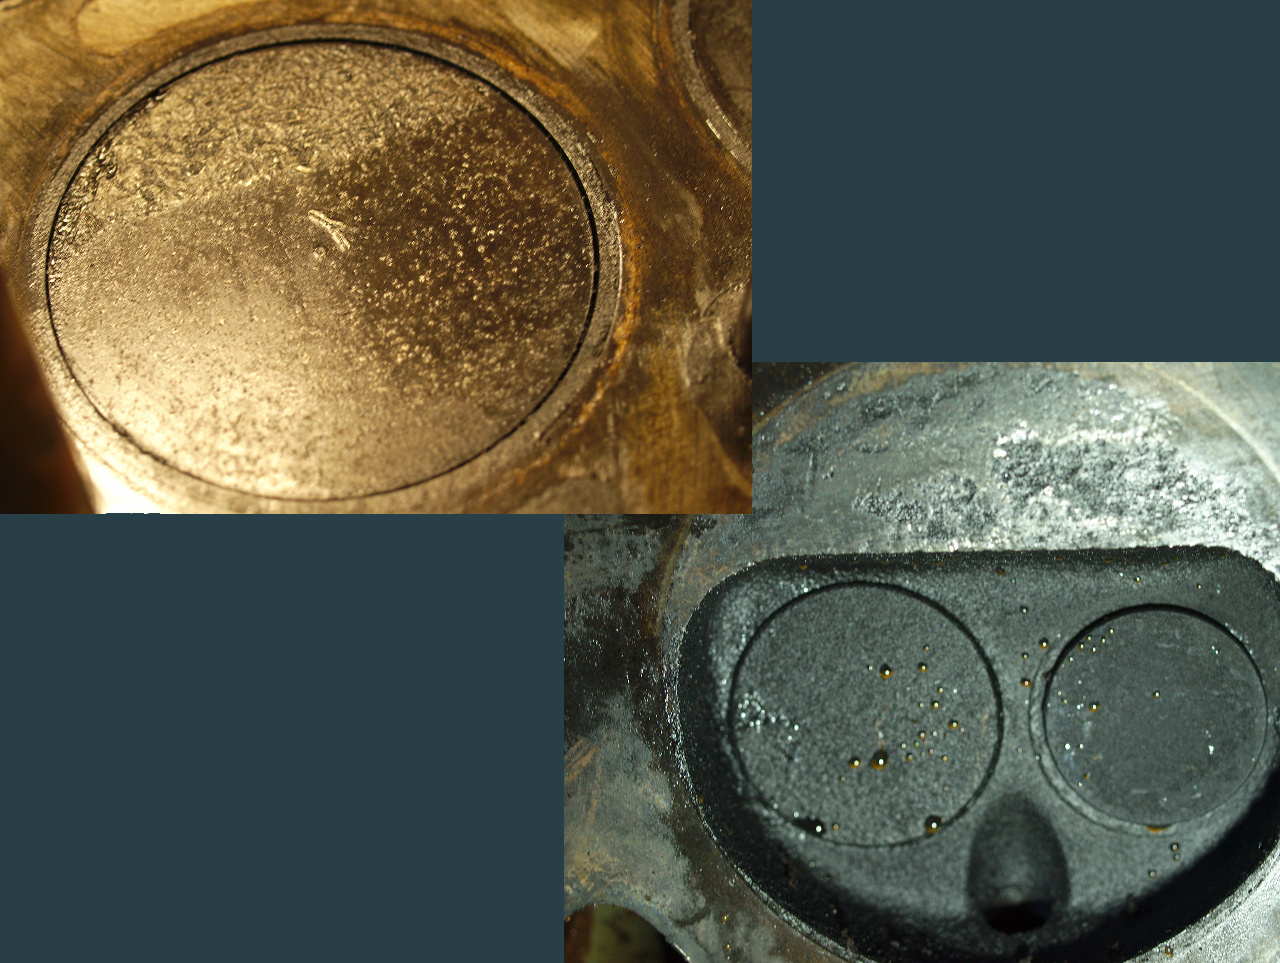
Started measuring the bores this evening. Didn't get far with that. Getting wacky results that might be down to sloppiness in my measuring technique (I'm using snap-gauges and an outside mic, for now), and measured an average 98.62mm by 98.75mm at the top of cylinder 1 underneath the wear ridge when the widest new bore spec is 98.44mm and maximum wear spec (+0.010in) for that would be 98.69mm.
Hmmmmmmm. The investigations will continue.
Anyway! Back on to the rod-length thing... As I was getting changed out of my overalls after giving up on measuring the bores, I was pondering how much I'd have to have the piston stick up out of the block to get the appropriate compression ratio, and a sudden realisation hit me. I didn't consider changing the rods earlier, because there is nowhere for the piston to go. So that's why I was noodling over pistons instead.
Some very brief searching tells me that there's a good amount of Chevy stuff with a 3.875in bore (Makes sense, there's family connections at play, if you squint real hard.) so even if that doesn't give me the direct result I want, there could well be something close enough to make work. More investigation required.
24 Mar 2020
Mm, having had the time to start digging into piston catalogues rather than briefly flipping through google results, it appears that the "3.875in" results for the Chevy stuff is actually the stroke, not the bore. Ah, so close, yet so far.
No matter, the search will continue.
(And the moral of the story here: The computer will find things that roughly match what you searched for, but it is not smart enough to understand what you really mean; just that it found a page that had "piston", "bore", and "3.875" on it.)
12 Apr 2020
Yeah, looks like I saw too many numbers and got confused. Seems like it's the 283 that shares the same 3.875 bore with the RL, but further digging is making it look less and less promising.
RL gudgeon pin is 1.000" dia; the 283's is 0.927"; the RL pistons have a compression height in the region of 70mm... And, by my calculations, I'd need to add a ~5mm dome on top of that to get to where I want. If my calculations are correct, and the engine is what I think it is; which is something I am less and less confident about the more I think about it.
Bearing in mind, I was under the impression that it's a 6.1:1 engine with an early head based on having the casting number for the early head; but further reading in the manual is casting more doubts over that. (The devil is in the details.) Might just have to set aside the thoughts of a bump in compression for the time being, and leave it as an exercise for the future. (And, of course, as others have mentioned I could always add compression dynamically...)
I've measured the bores with some concerningly accurate tools (albeit wielded by a concerningly inaccurate tool), and come up with figures for the bore diameters that show wear that isn't altogether terrible. Wear limit, per the EMER, is 0.010"; which works out as an overall bore measurement of 98.653mm (3.884in) at the tightest grade. Largest measurement I've got was 98.51mm (3.878in); there's a smidge of ovality and a pinch of taper... but I think I may well be good to just get another set of rings, give the bores a quick hone, and call it good for the time being.
Perhaps I've been overthinking this. :D I can always save the hot-rodding portion for later down the line, maybe get a set of fresh liners, bearings, etc to stash away for a future full rebuild; and just see how it pulls as it is. Certainly seemed sprightly enough in low-gear, with 4 pistons' worth of stuck rings and a stuck valve; and I've definitely got enough on my plate
This under/over-thinking brought to you by Gin.
glenanderson
Another possibility worth investigating, if you simply fix the existing engine for the time being, is to look at straight six Chevrolet engines, because I'm sure they're from the same family. It might open up a whole load of off the shelf solutions in a package that will suit the nature of the beast.
I'm assuming a diesel conversion isn't on the cards?
As far as I understand it, they're of the same family but not directly related. There's a definite resemblance on the outside, though.
Diesel conversion not on the cards, no.
Now, I've previously done the measurements with the chambers and whatnot! And I got 120cc, which appears to work out to having a CR of 7.4:1, which certainly isn't what I'm expecting. I really do need to go double-check things just to confirm what reality I'm operating with. (Would help if I'd not already pulled all the pistons out, but hey, I can sling one back in again quickly enough.)
Who knows, there's always the possibility that there's another engine change that occurred in a range later than my manual covers, and I'm operating on faulty assumptions from the start!
19 Apr 2020
Well, sanity check done. I started with very little of it, and I still have very little left. Also, the other measurements appear to be what I was expecting, so the engine does appear to be somewhere a little north of 7:1 comp (possibly nearer 7.5, depending on the head-gasket thickness). Nice!
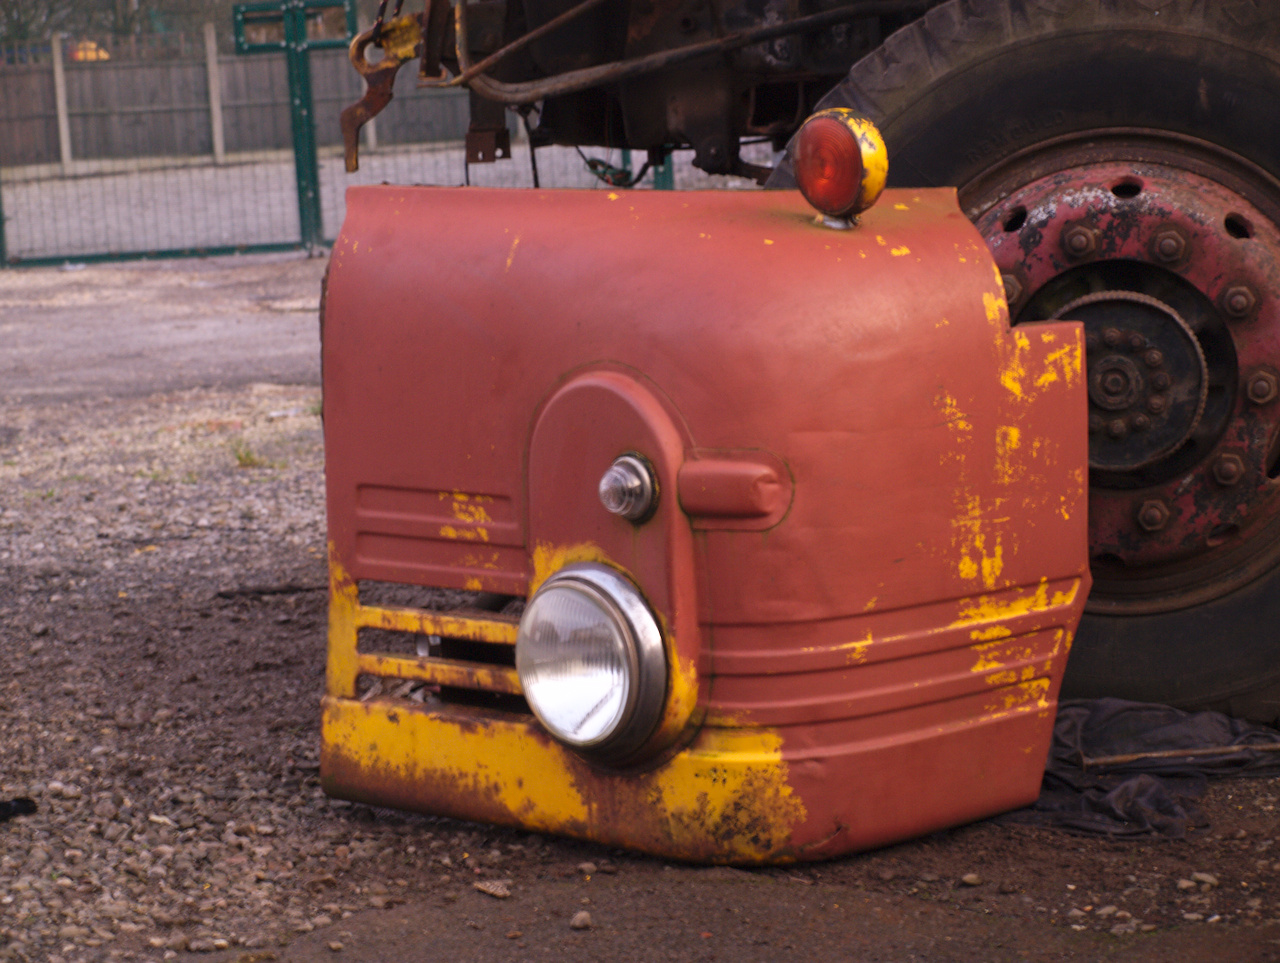
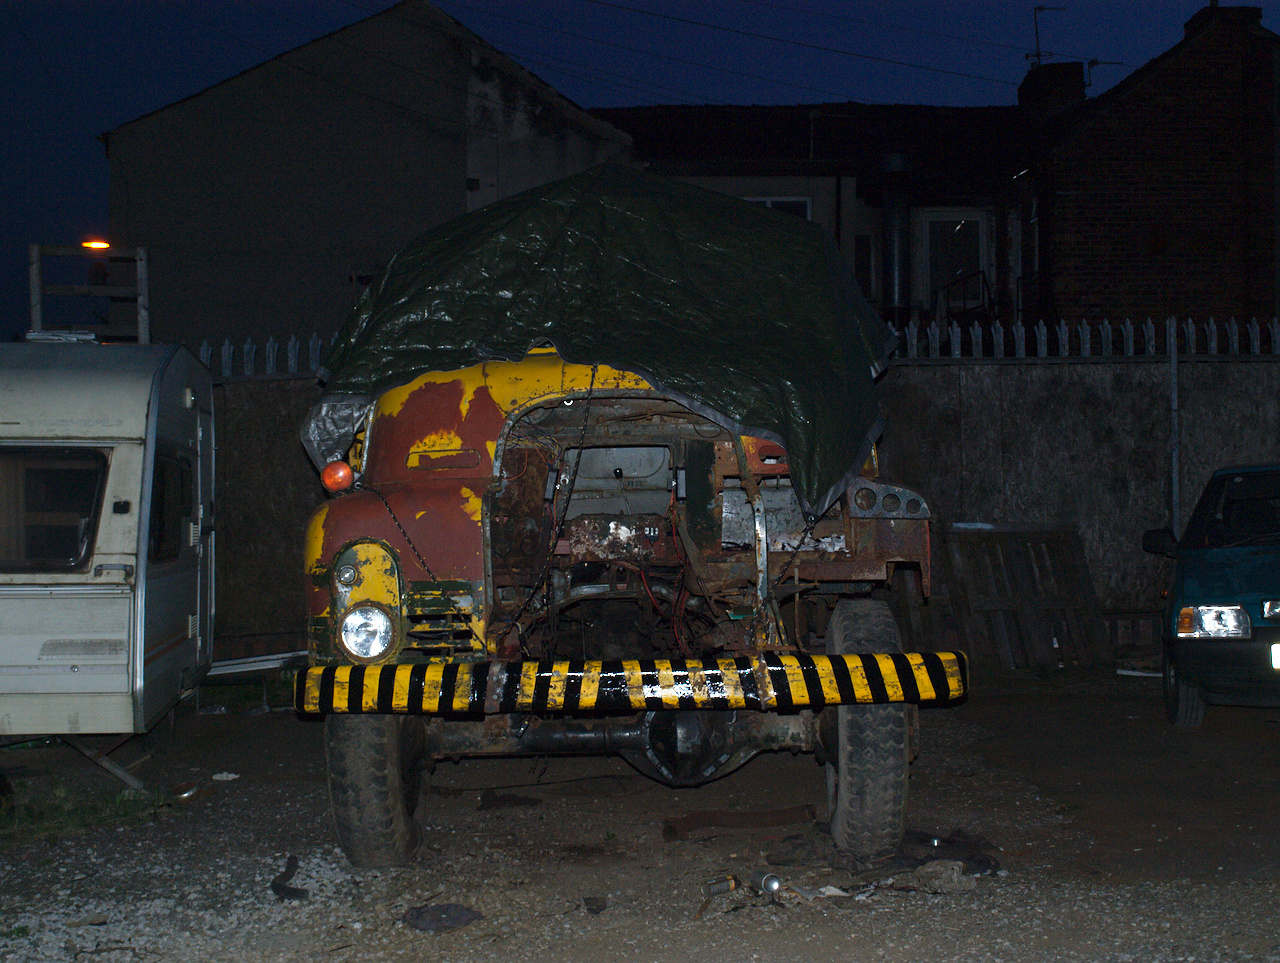
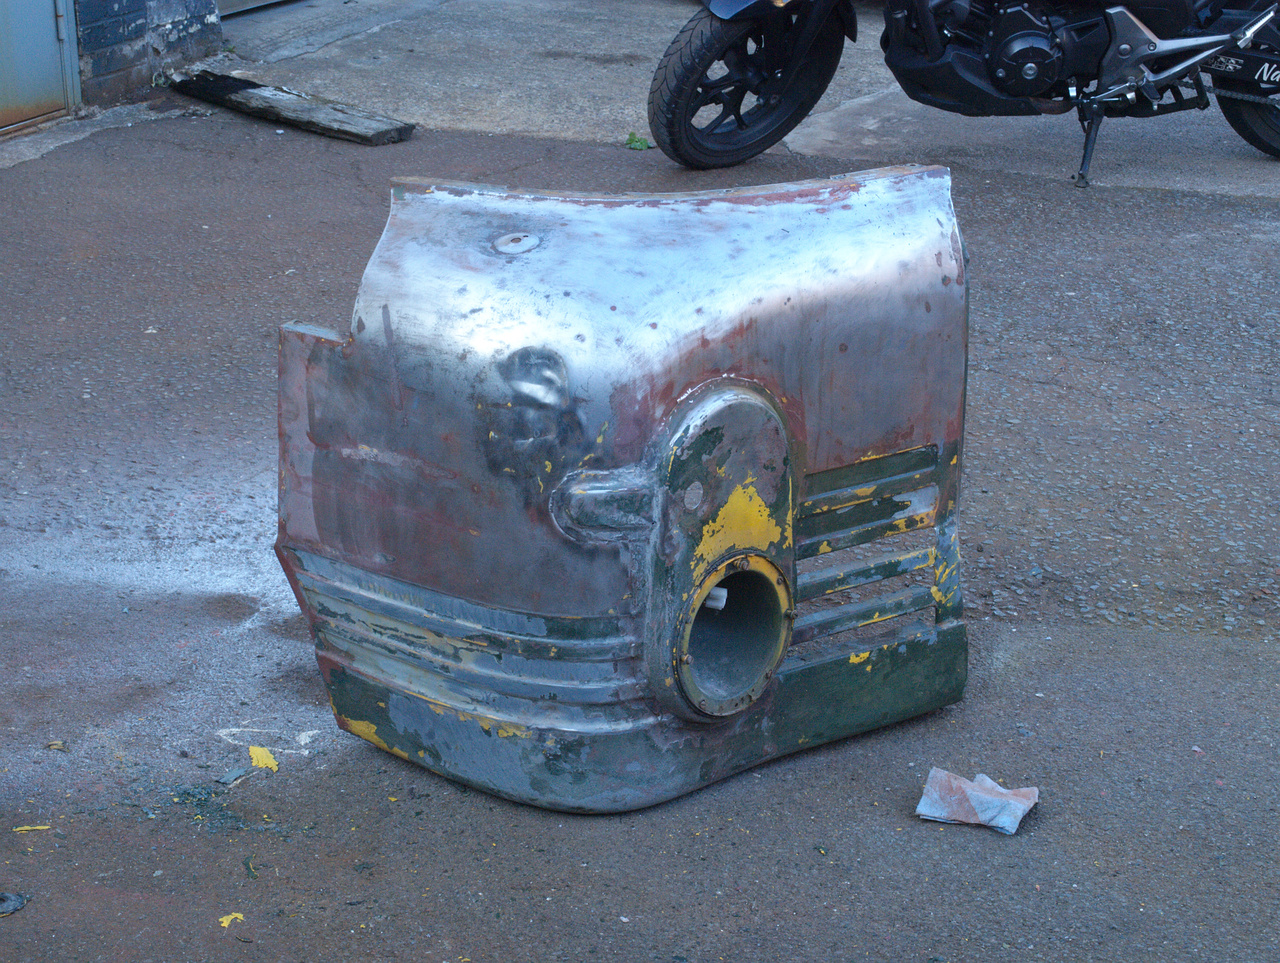
Since then, I have... ...mostly just painted the bumper. Well, the weather was nice up until about 1 this afternoon, so why not. Shown here after the black stripes were done, but before I masked it off to start on the yellow.
I've also been noodling over how to mount that front towing hitch (Probably something similar to how it was before, but less wonky), and the winch that I may or may not fit (Below -- and slightly behind -- the front bumper, with drop-brackets from the chassis, I think.)
Furthermore, I removed a gaping hole in the roof where there used to be a wiper spindle, and put back a neat hole that fits a wiper spindle.
Welds on the back still need tidying up, but since that whole cavity behind that upper 'dash' section needs serious attention, I just slapped it with paint for now.
Flush with success from that, I went to free up the other spindle to
try have a matching pair. And snapped the spindle shaft trying to turn
it. 
Okay, I'll have to make a new shaft, just need to get the remains of the seized old one out...
...and then I managed to snap the cast mazak outer, trying to drift the remains of the shaft out. Marvellous. Some minor engineering drawing done to come up with a replacement, but it seems perfectly feasible with a lathe.
In better news, more of my EFI conversion pieces have arrived. Idle air valve (A VW part), and now ignition coil-pack (for a Vauxhall Omega V6), to be added to the pile.
29 Apr 2020
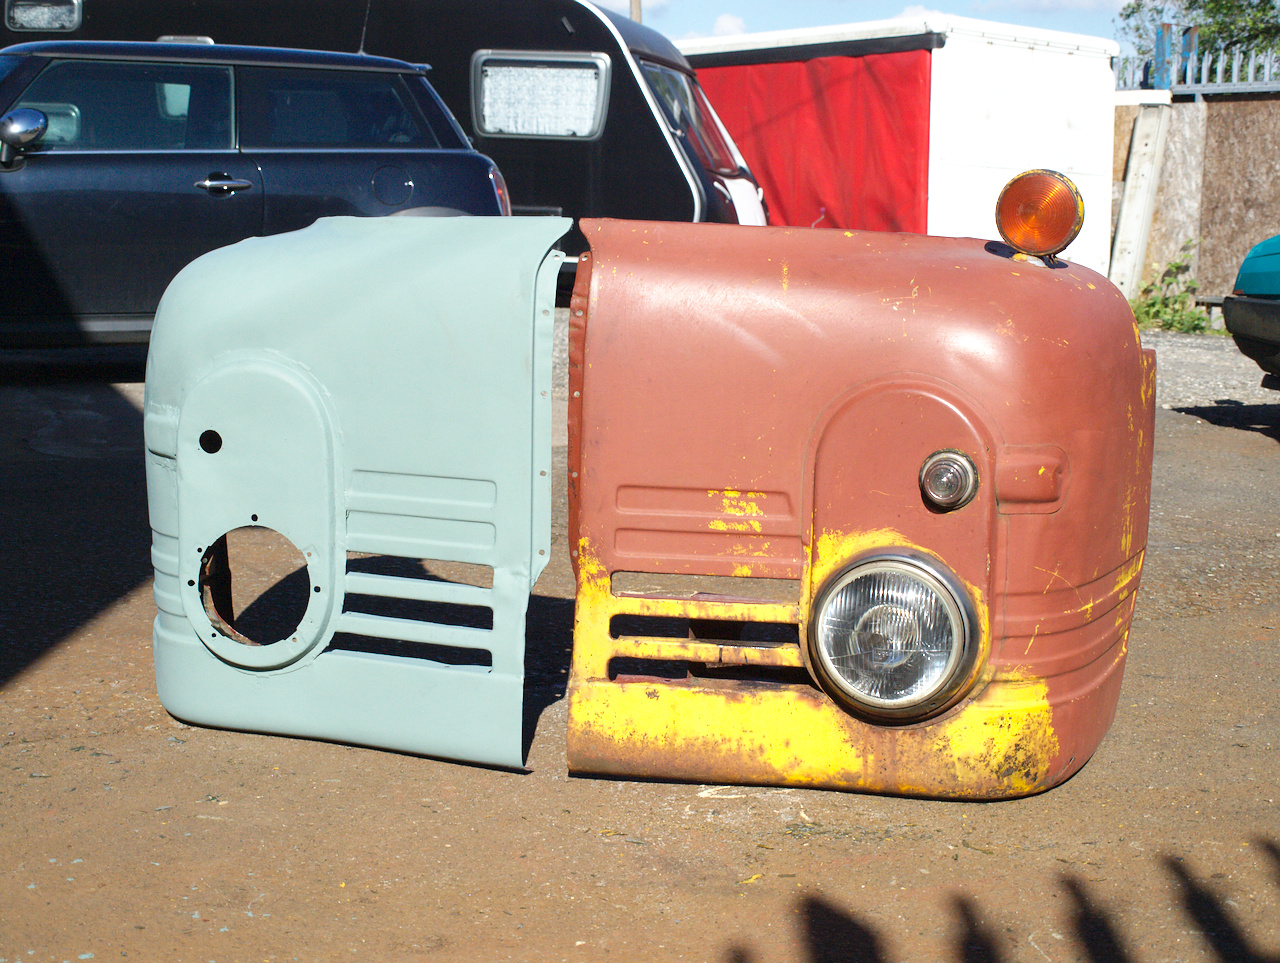
I've finished painting the (front of the) bumper.

Not perfect, but ...realistic? (There's a few small spots where flakes came off when I removed the masking, and there's a couple of little bits where primer bled under the masking. Either way, it's plenty good enough.)
And then removed the other wing, so clean-up and painting can continue. Lots of scraping and scrubbing going on, and annoyingly I didn't make a big enough push to get it cleaned up and in primer before the rain arrived. Oh well.
I can at least get on with cleaning & painting the back-side of the panels I've removed, in the unit. I've also got a little fabrication to do on the bracket that holds the hazard switch/RPM gauge; partially because I was a little enthusiastic removing metal for the cutouts, so I need to re-add some just to improve the fit, but mostly because I need to add a place for the indicator switch to go without it looking like a complete afterthought.
I have an idea for how I want to do it, and it involves turning that bracket into a 'pod' by enclosing the sides rather than it just being a flat plate with some holes in. It remains to be seen how well it will work out, but I'm sure I can come up with something. Could've started on that today, but wasn't really in the mood to set up the welder and get all fab. So I reconnected the intermittent wipe on the car, and went home.
(...I may have even stopped off and given the car its annual wash on the way.)
Quite impressed with just how solid all that metal is. I was a little worried when I found the body-filler patches, but they turned out to only be filling dents rather than rot-holes. I like the dents. They give me something to ponder over... What did they hit? Who done it? That sort of thing.

That nice etch-primer really brings out all the dents and historic
welding, doesn't it? Yes, I've just spotted that bit on the inside of
the headlight ring that I've missed.
And, as a comparison to the other side:
Long way to go before they can be refitted, though, but today I felt like doing that so I did it. (The weather was just right for it. And it's looking like tomorrow is going to be another good one, so I'll try get the nearside wing stripped, prepped & in primer too.)
This panel took a lot longer to strip than I anticipated. It looks to be a replacement panel from the truck's commercial era, since it's not got the 4 layers of flaking Deep Bronze Green under the yellow; it's just a layer of black, and then the yellow, which has adhered really quite well.
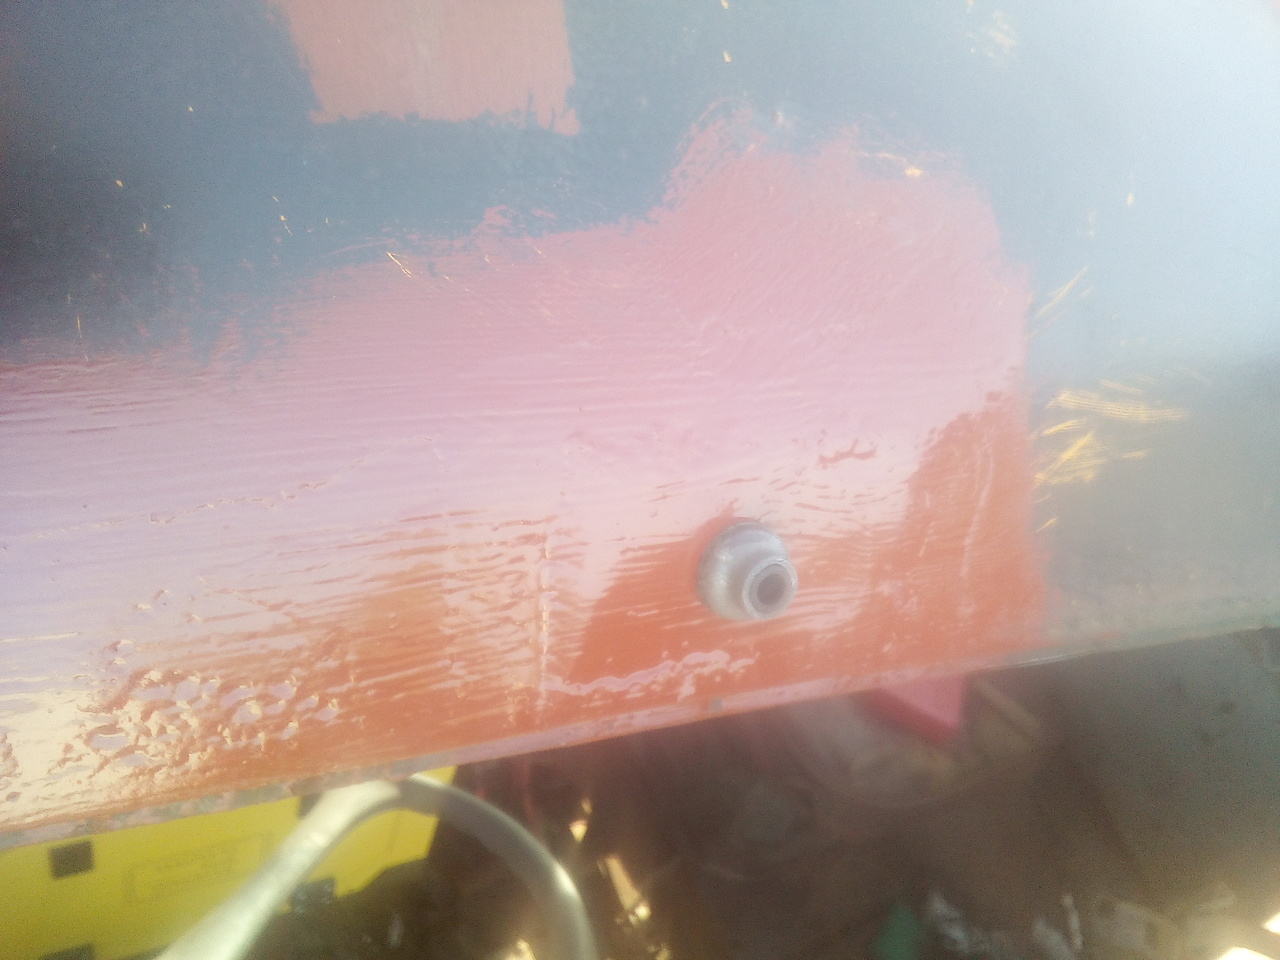
The only slight issue was a couple of pin-holes around the headlight, where the inside wasn't painted:
Easily-enough fixed, though; and then on with the funny 'grey' etch primer. Probably could've blended that weld in a little more, and made it disappear completely. But I didn't.
Matched set! One with that additional panel spot-welded on, as
expected for a factory part, the other with it welded on by a
workshop. Presumably it had a bit of an oopsie...
I'm guessing it was a function over form repair; no need for it to
look pretty, just stop the lights falling off.
Can't remember whether it was under green or yellow paint; if the former, then it'd be a military workshop that did it and I suspect they wouldn't be too worried about it looking pretty as long as they could just slap some green paint over it and call it good.
Anyway, speaking about not pretty...
I have finished up the tacho/hazard/indicator pod
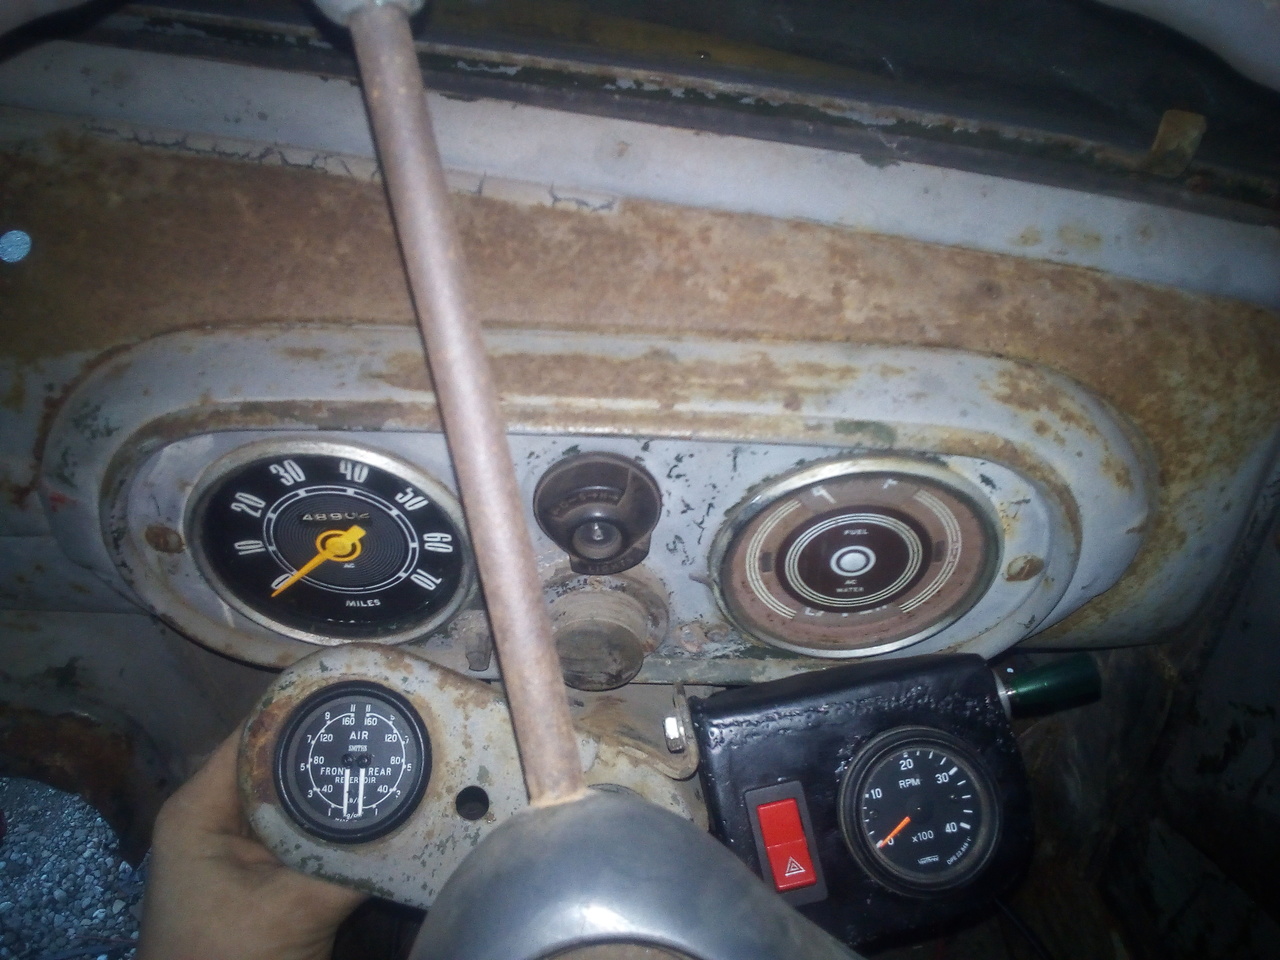
It's not perfect, but perfectly functional and I can live with that for now. I do need to make an adapter for the original air-gauge mount, to take it from the oddball size down to 52mm for that nice twin-circuit air gauge. Also need to add in a little warning lamp for the hazards somewhere but that shouldn't be too much of a problem. (The switch isn't illuminated, and the indicator switch doesn't -- and can't -- flash with the hazards.)