So I started some paint/rust stripping, and priming inside the cab.
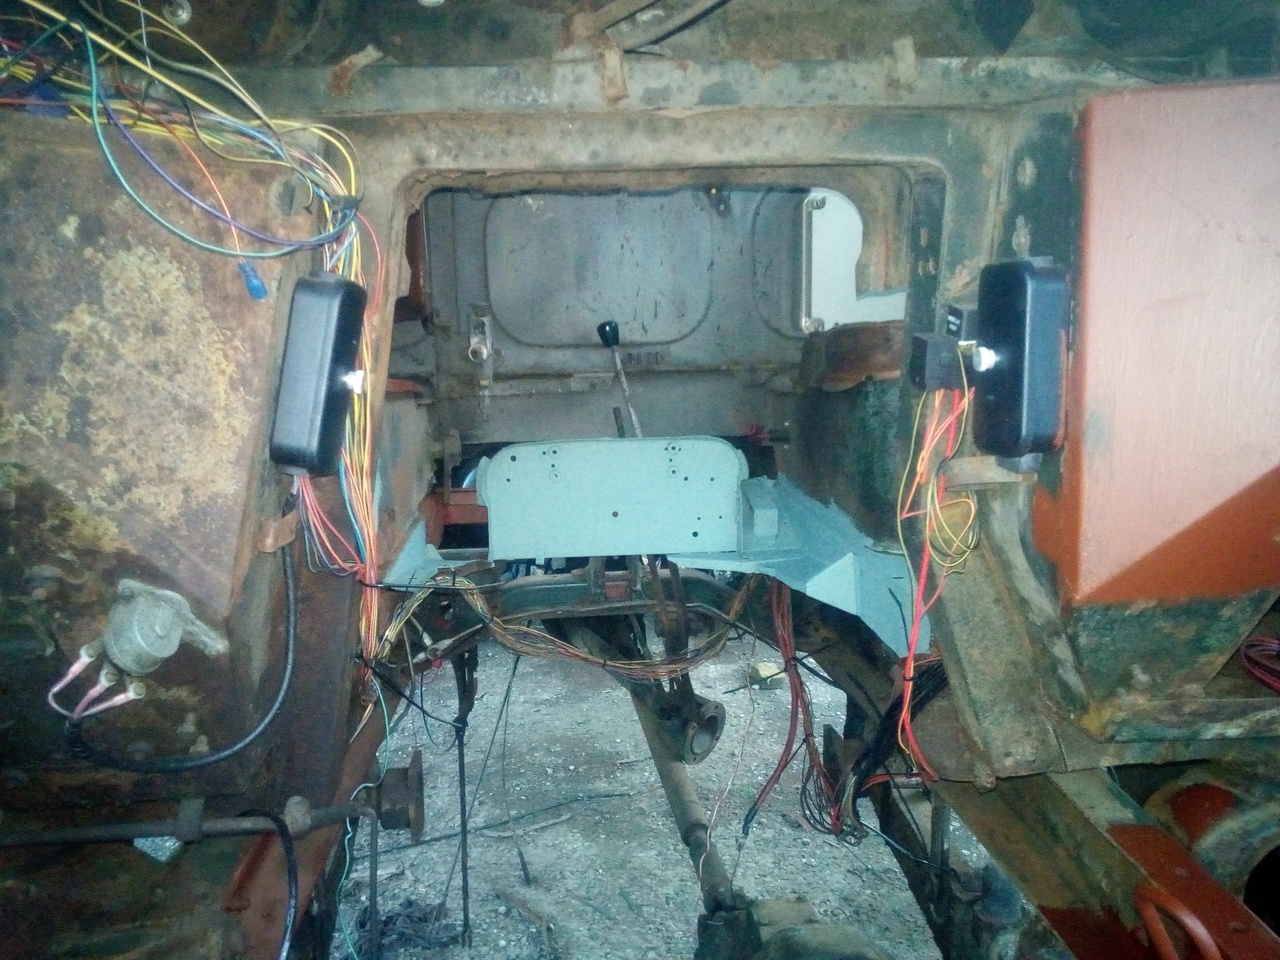
I was going to just use the grey primer I have, but I had some of the etch primer already out and left over from giving the front wings another coat. The floors have since got a little red-oxide because, again, I had some of that out from painting other things. The grey primer would be more ideal, since I plan on the inside of the cab being a grey colour anyway, but hey. It's got paint on it, that should slow the rust a touch.
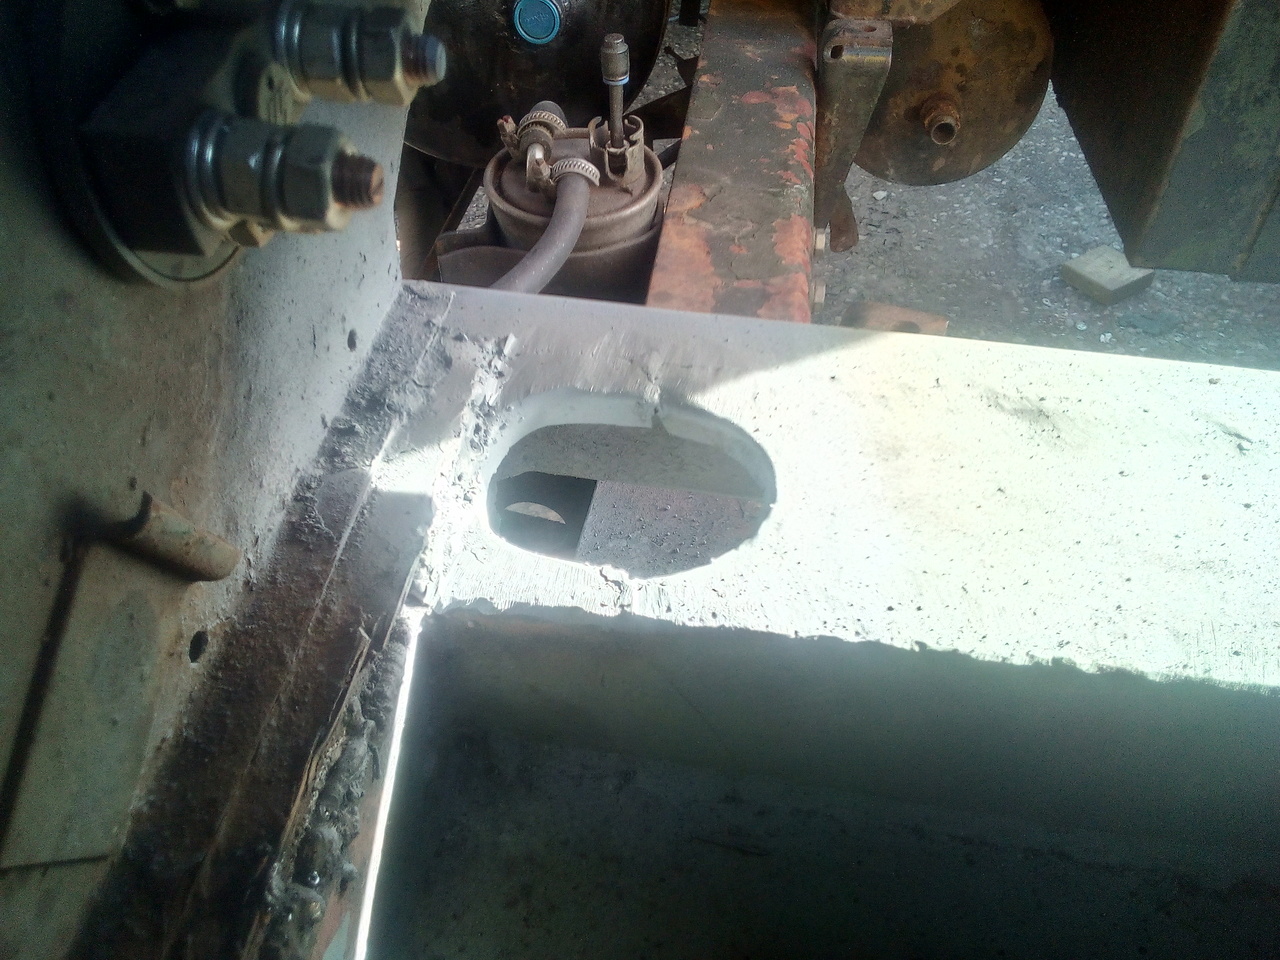
First piece of new floor in!
...okay, it's only the bit immediately behind the battery-box, but it counts. Made in two parts so that I could make a neat(ish) job of putting a hole in for the wiring to pass through. Welds on the side of the battery box still need dressing back; the picture makes them look worse than they are. And they don't look all that pretty anyway; having to do chain-of-tacks doesn't really give the flux-core time to warm up and do its job, so they look porous as all hell.

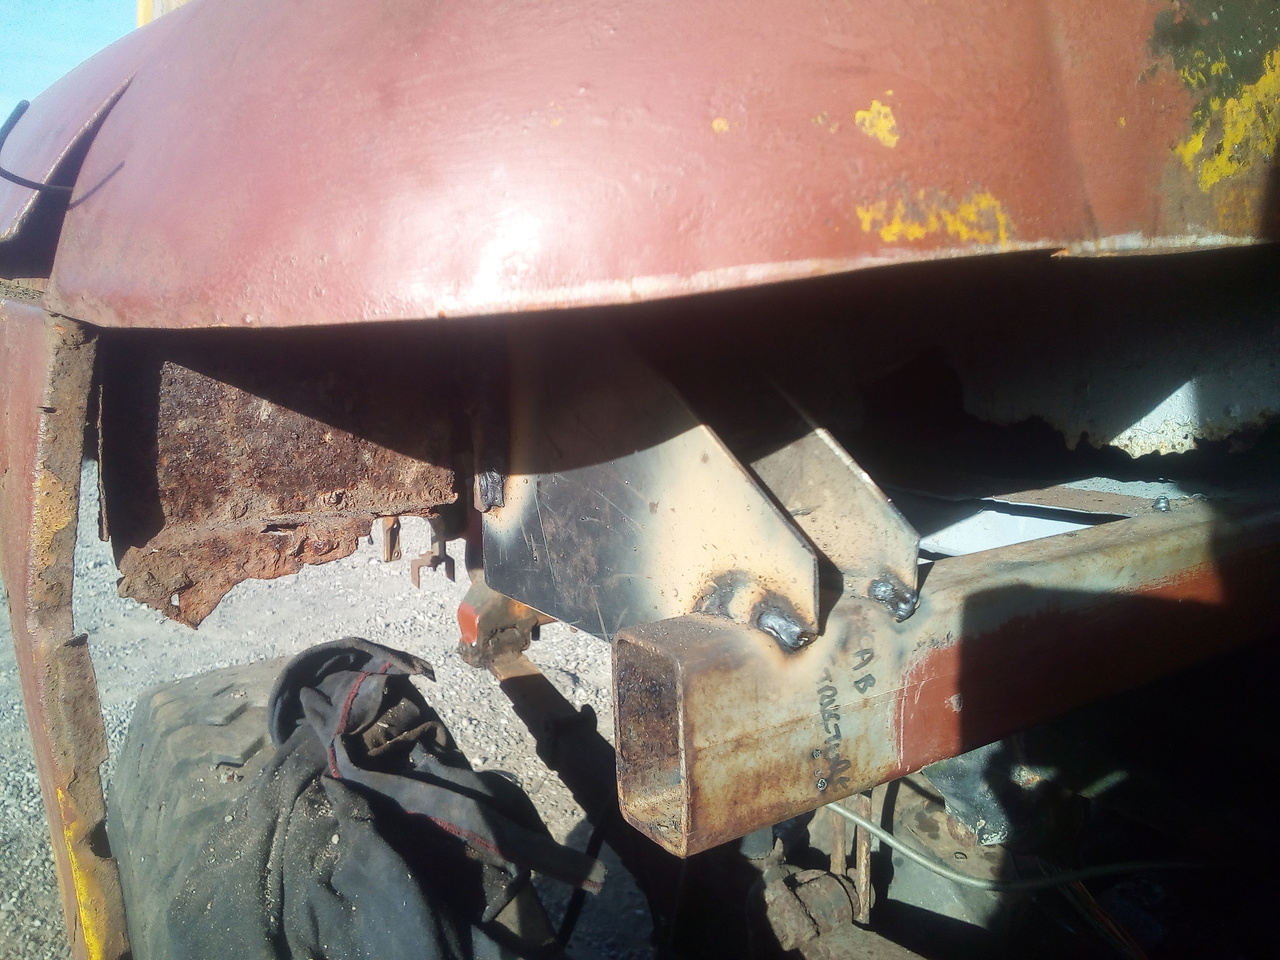
Bracketry!
Quite stout bracketry at that. This ties the outer edges of the cab frame to the rear crossmember quite rigidly. Once I'd done this, the passenger door stopped being quite so stubborn to open, as the cab would sag and bind things up once I started to open it before.
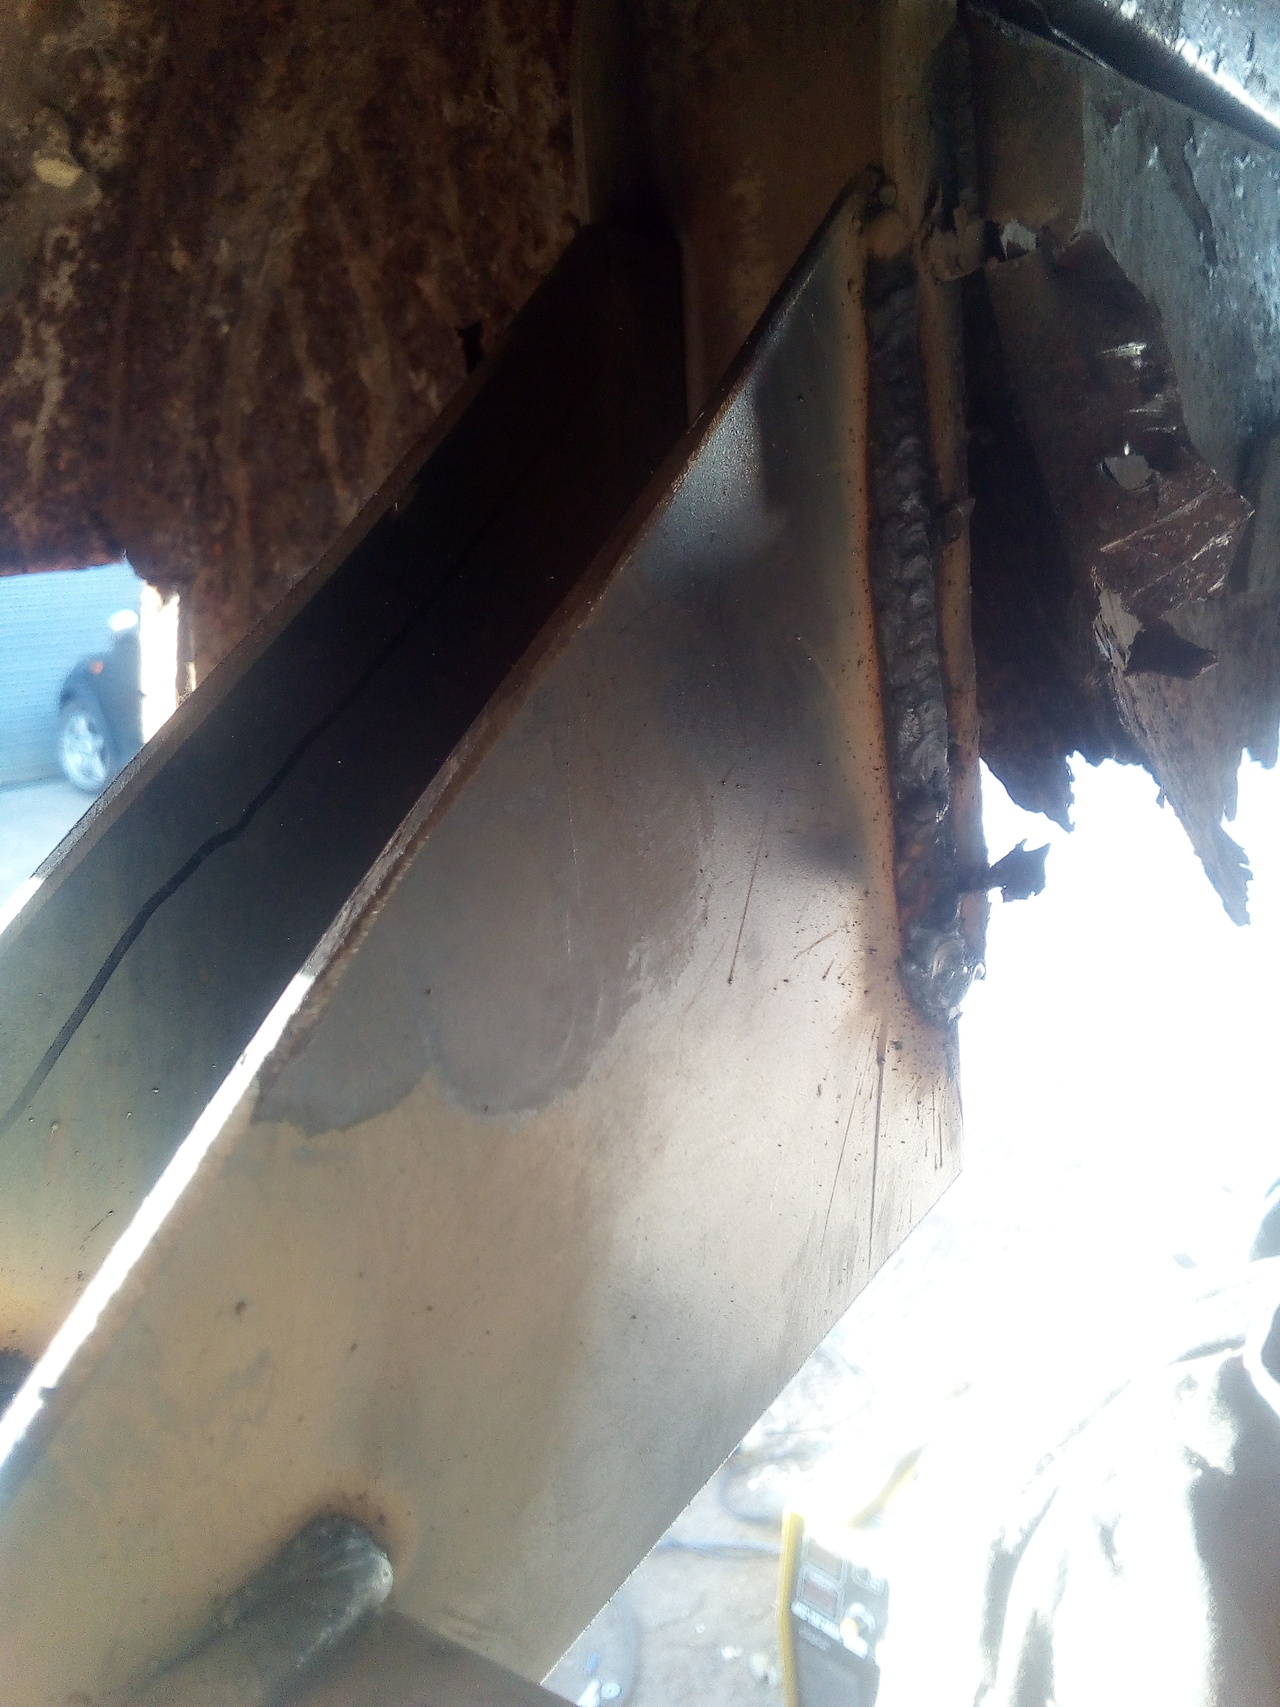
I also did the other side, too. So that's progress. (And then I spent the rest of the evening laying under the truck, pondering.)
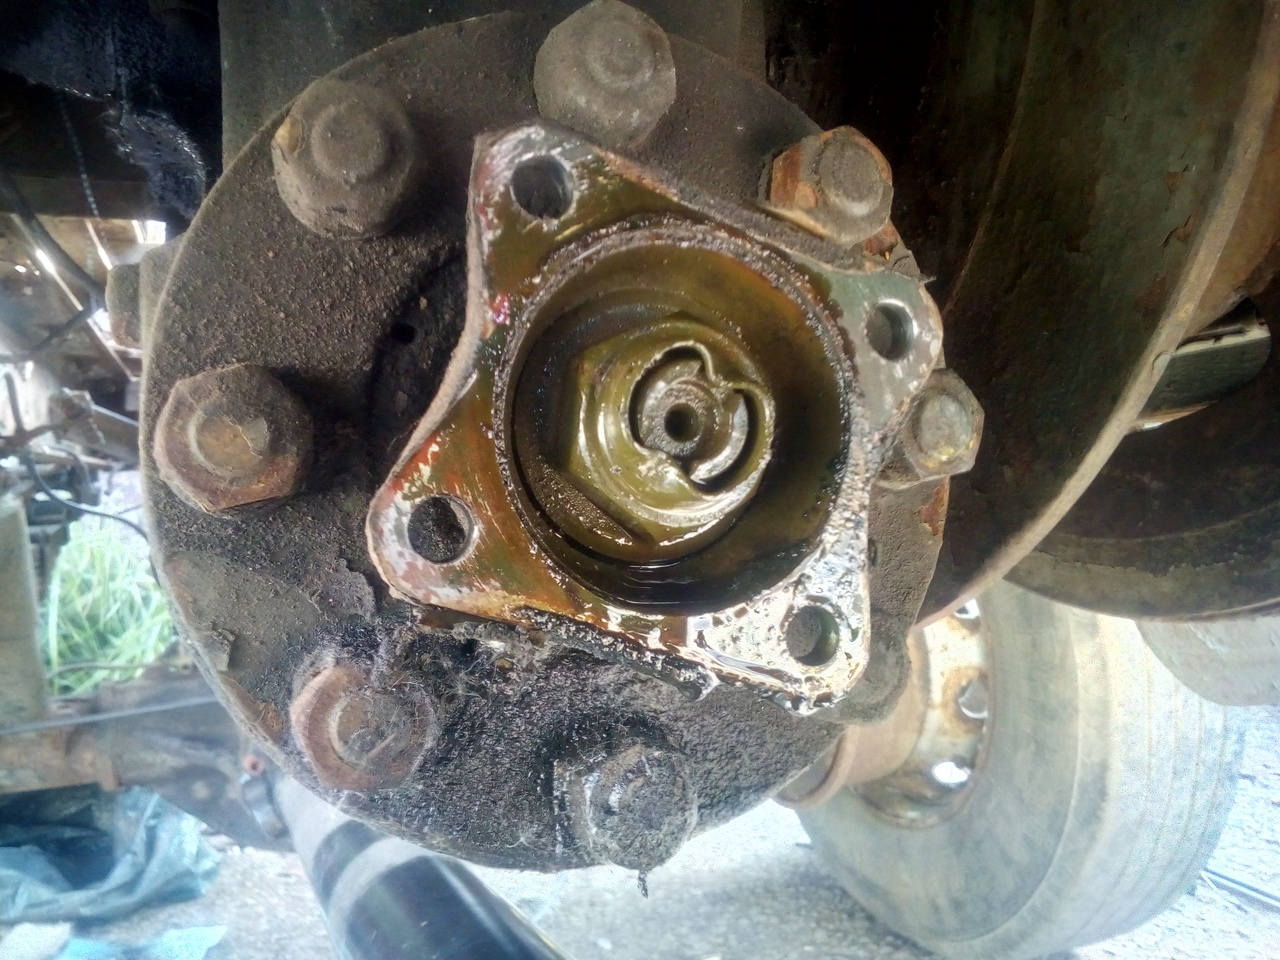
Pondering!
"Hmm... I wonder if I could drop that prop out for a pump and hydraulic motor? Make the winch a bit more usable, and would give me the option to run other stuff too..."
And I reckon I could, too. I would have to build another bracket,
though... 
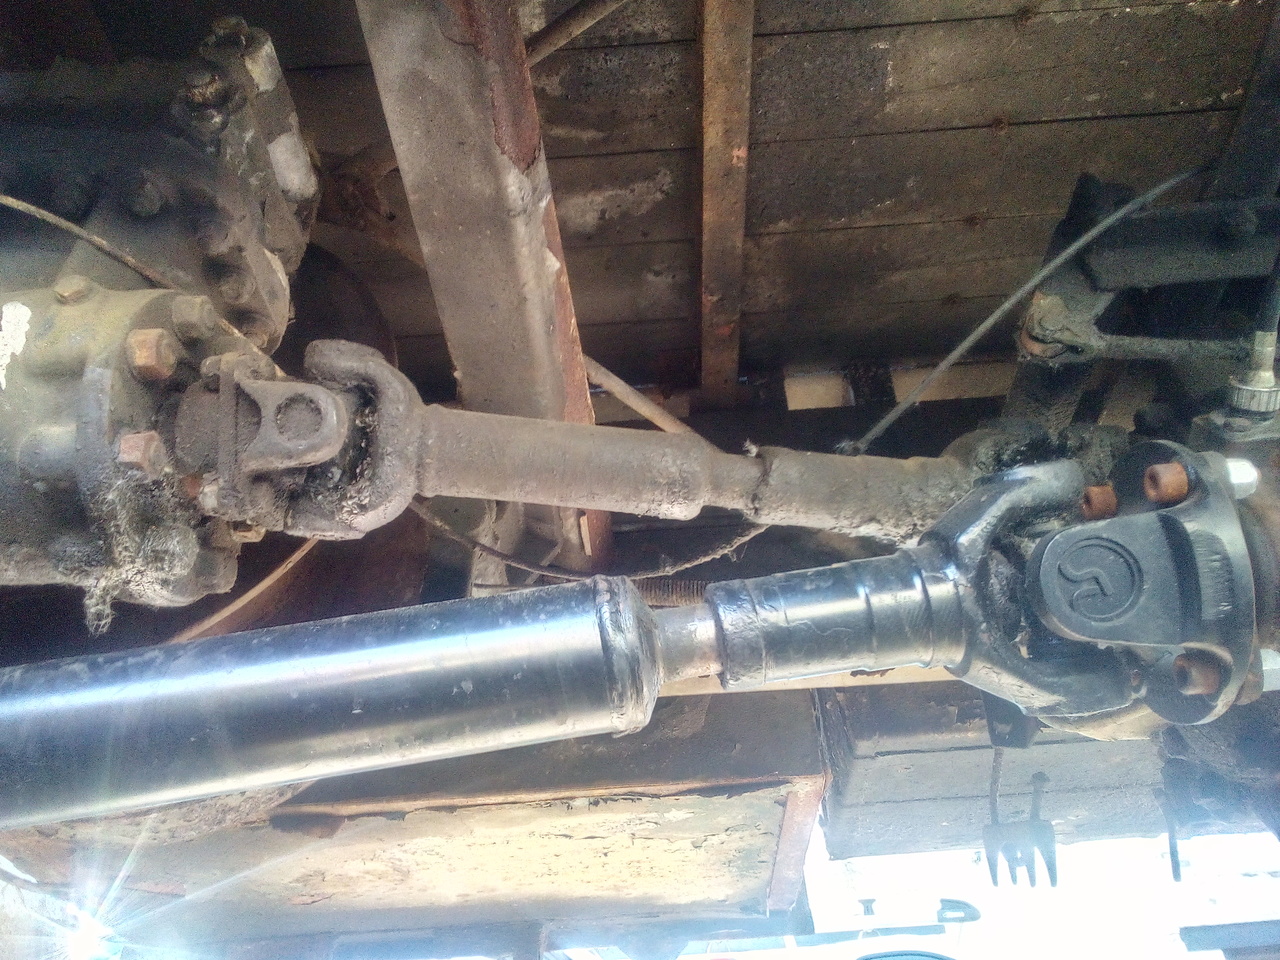
The winch definitely needs some attention, though. Just about everywhere it's possible for it to leak oil, it is doing.
(That'd be down the splines for the flange, then.  )
)
Some other bits fell out of the engine, too!
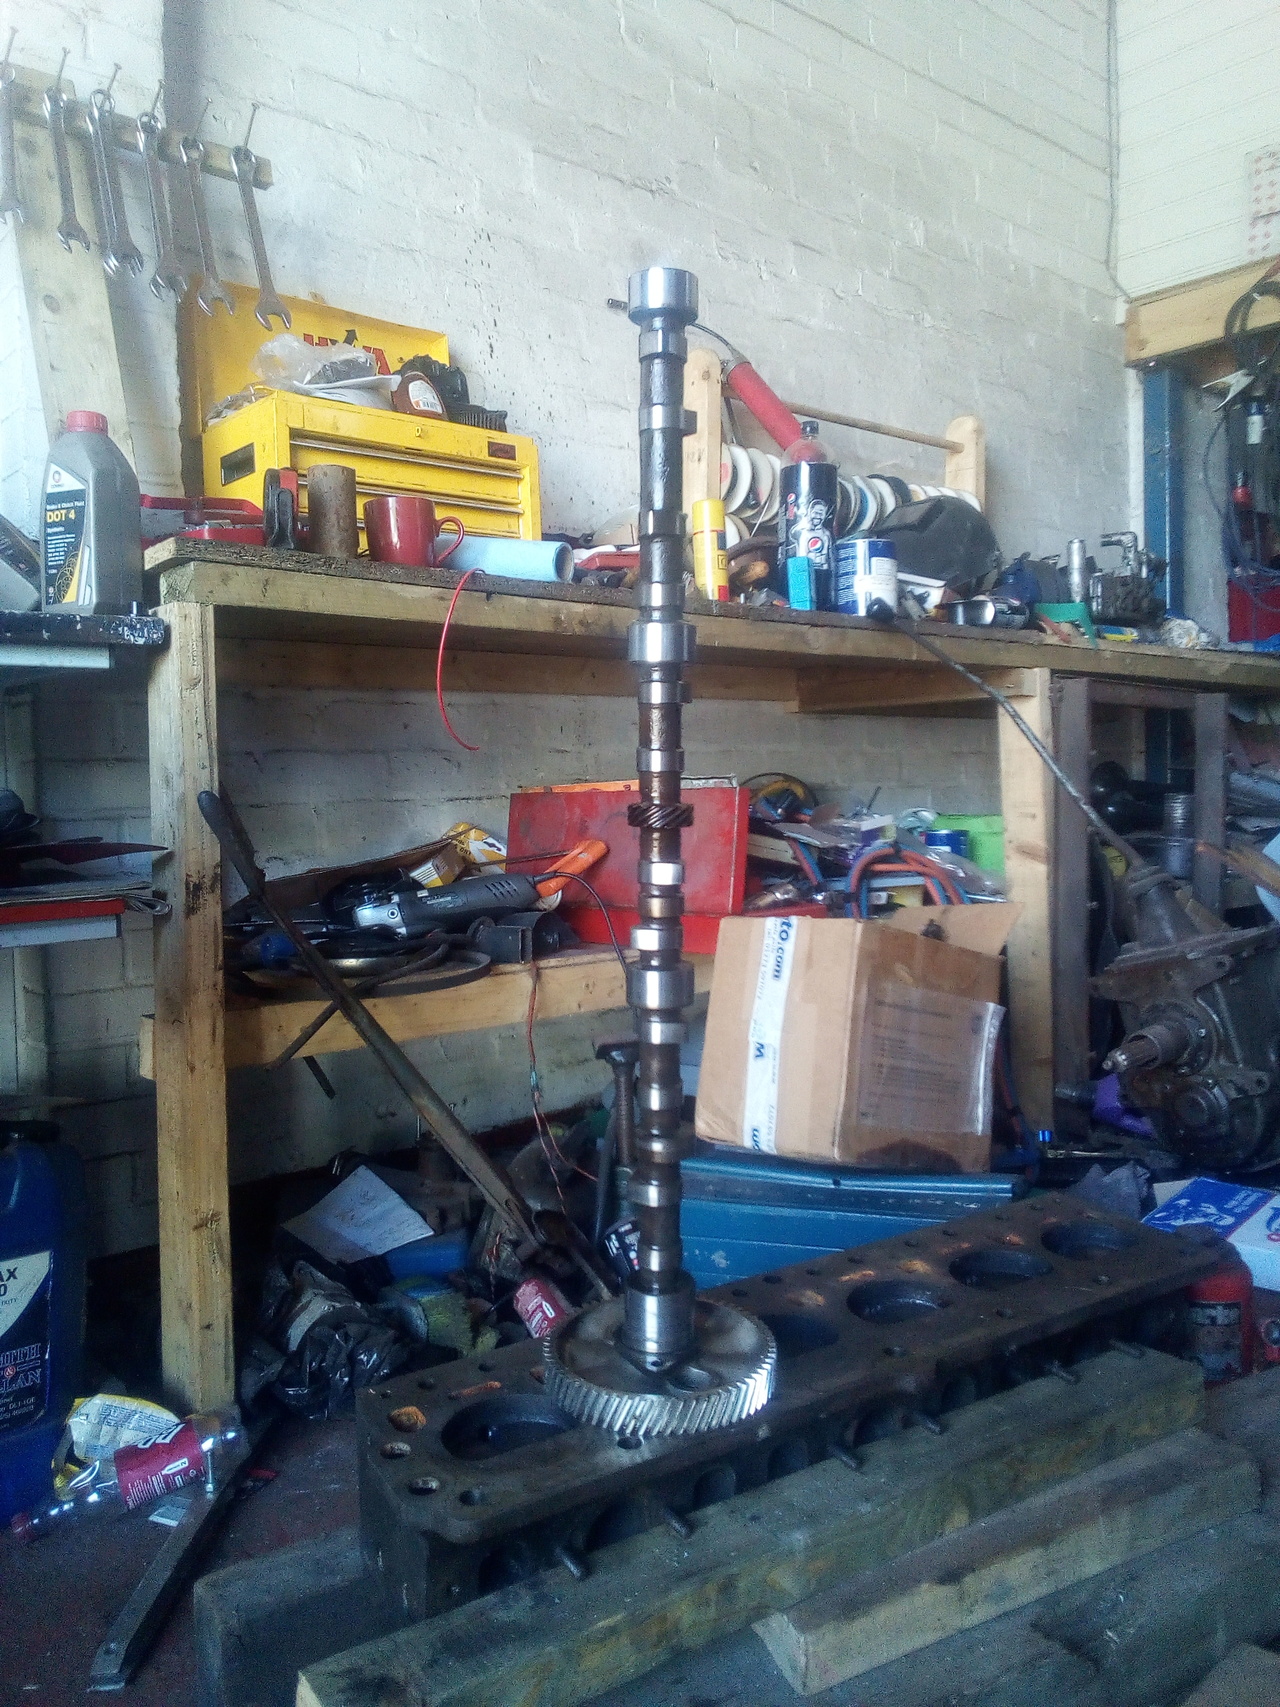
Oh no.
Anyway, here's Vandervell... strums guitar
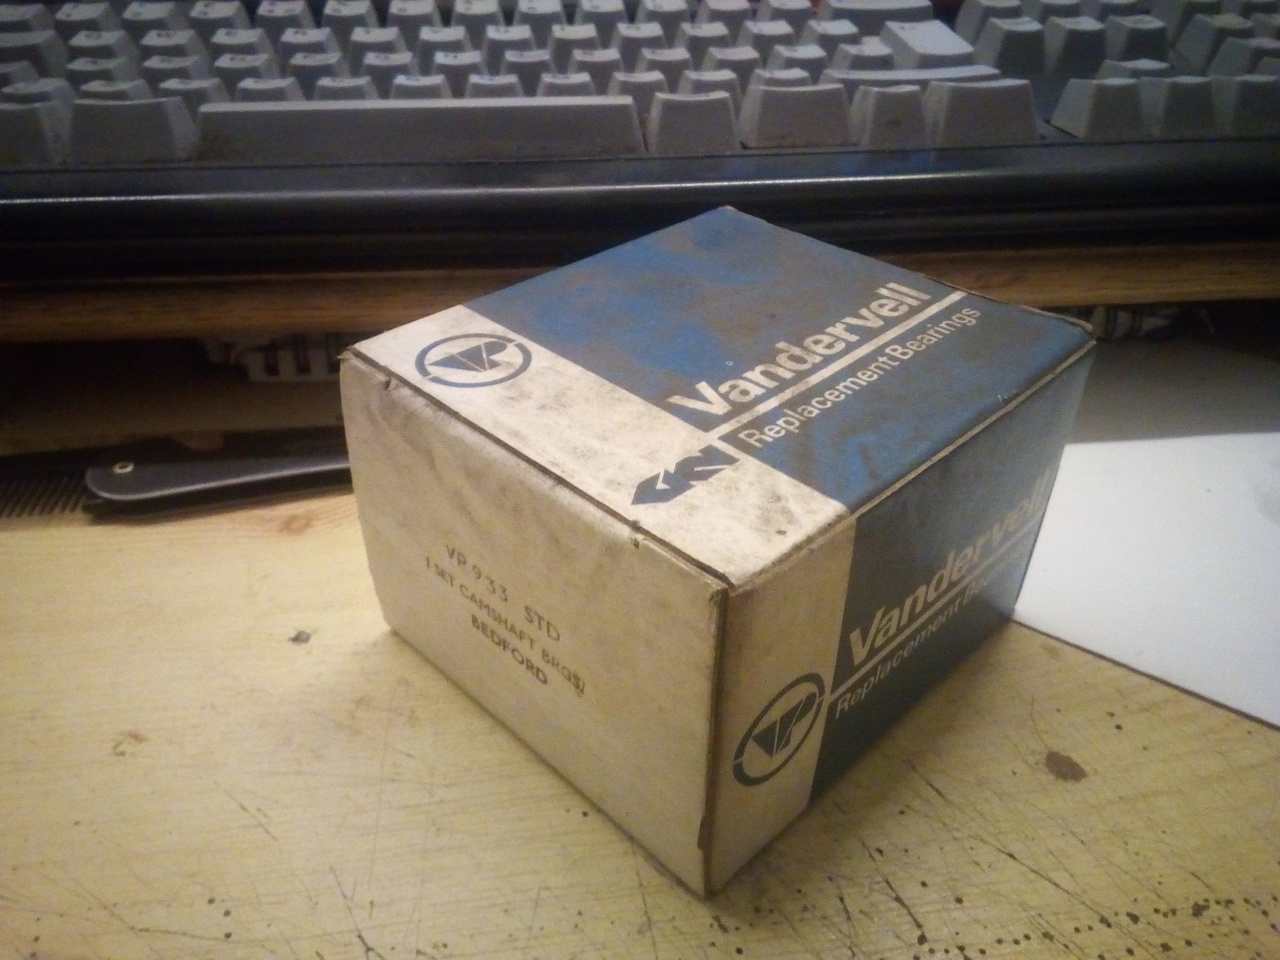
(Bradford Grinders has them in stock, and I was pleasantly surprised at the price.)
For those of you who want more video of me making a fool of myself, I have gotten a few bits and pieces over the course of several months (when the camera cooperates, when I remember to bring it with me, and when I'm doing something that's worth videoing.) but need to edit something together. I will, however, continue making a fool of myself regardless.
Sweetpea
Your cab must have been one step from crumbling off the truck. Well saved that man!
The more rot I uncover, the more nervous I am about having thrashed it around that industrial estate...
Oh, and on the note of engine parts...
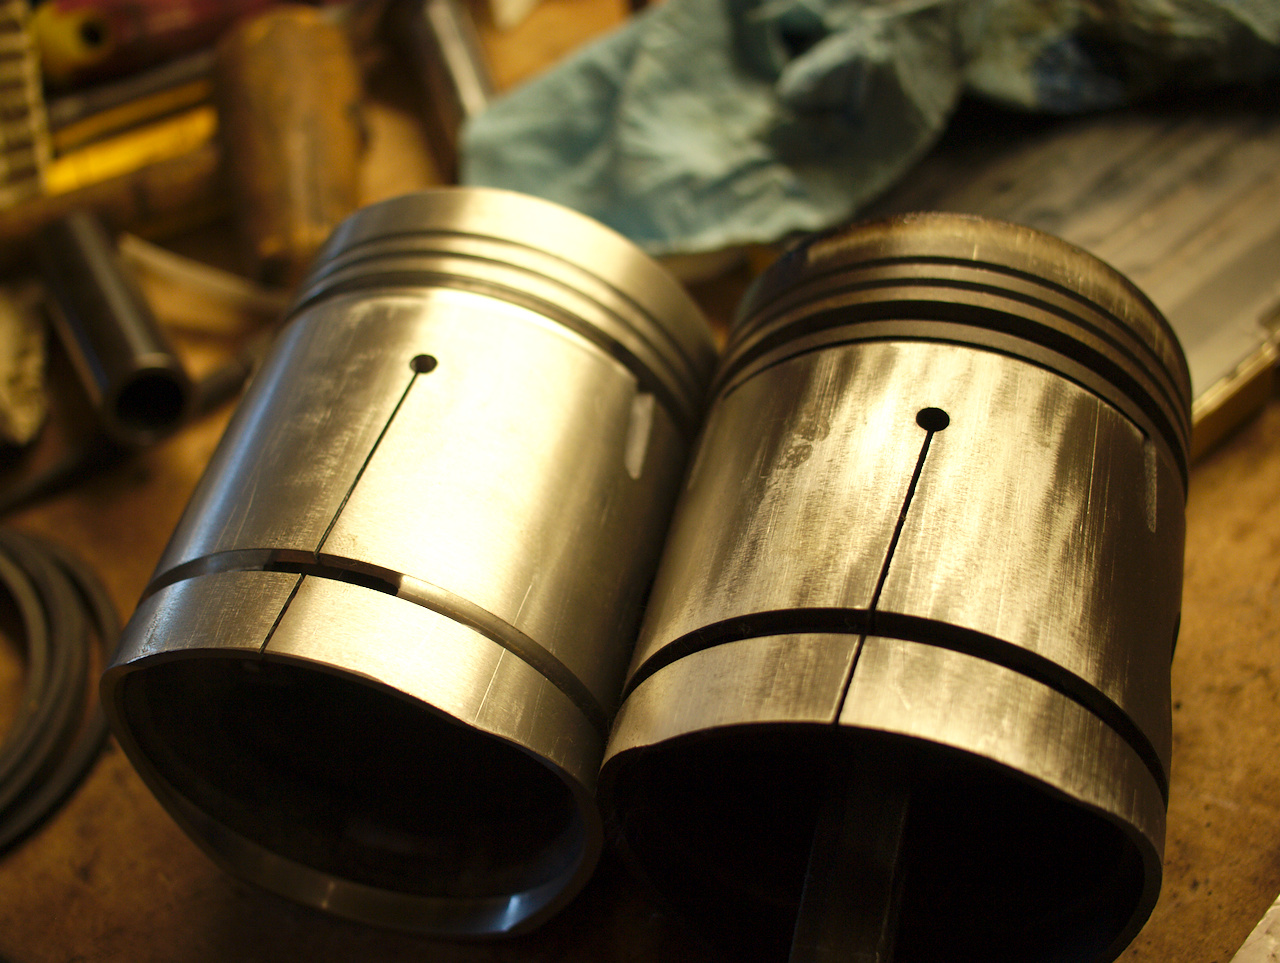
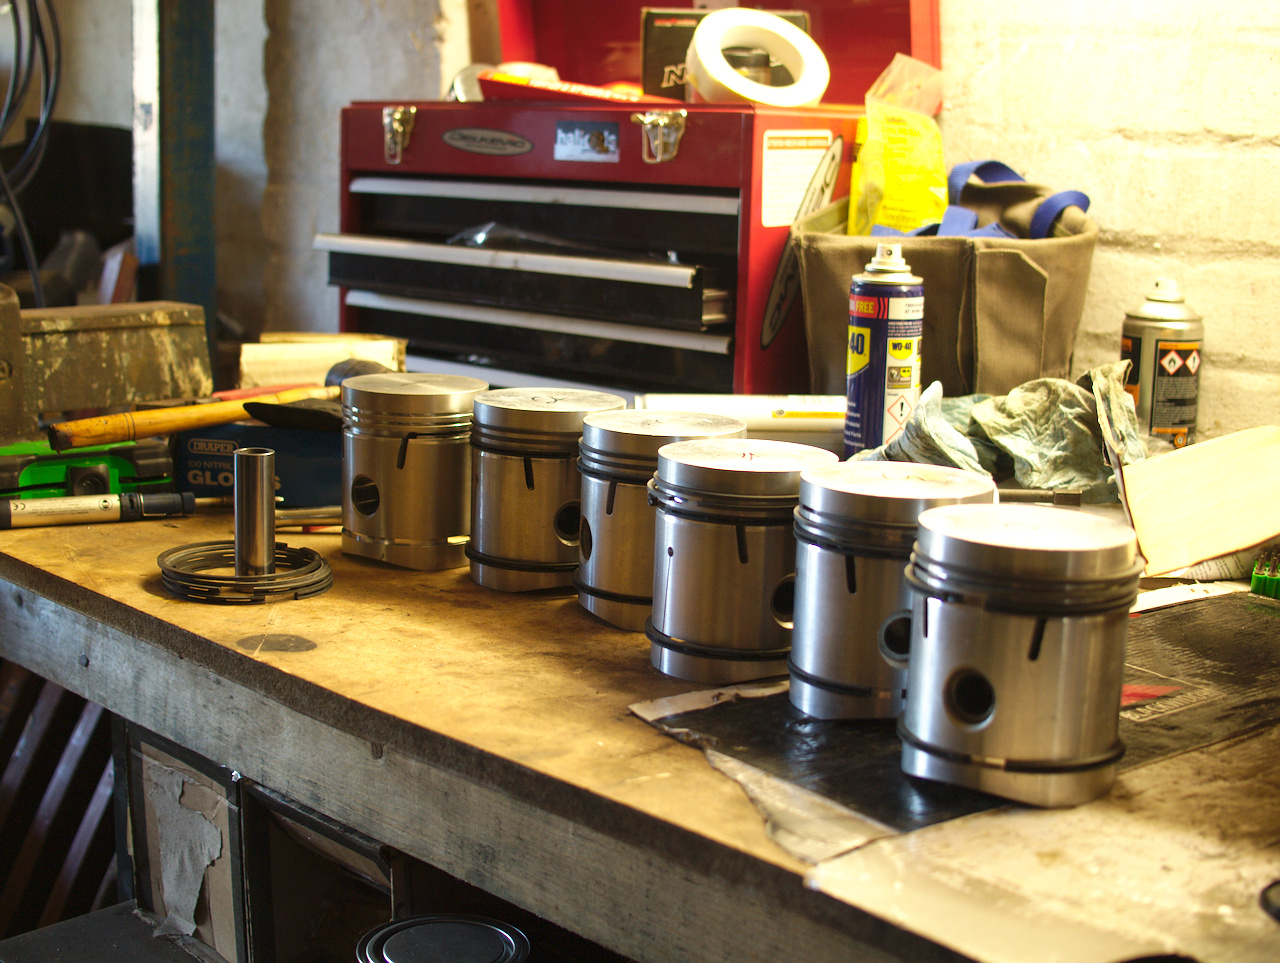
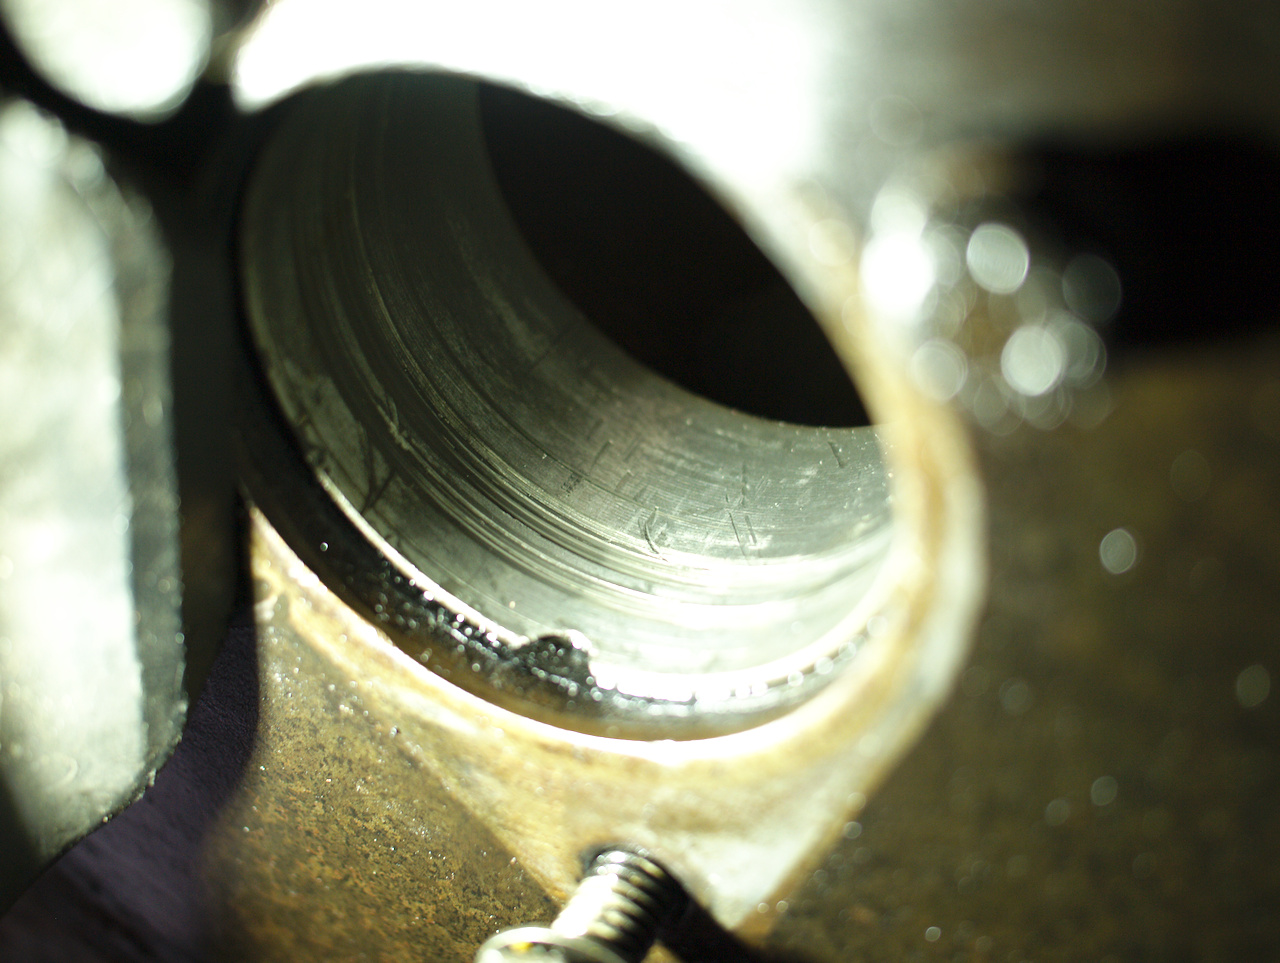
One ... well, six more pieces of the puzzle. All but one of the bores have cleaned up with a honing; but they're right on the outer end of the spec, and №4 has scoring that still catches the thumbnail even after honing. If not for the scoring, I would probably build it up like that and run it anyway; but as it is, I'd rather not. Going to be at this forever, at this rate!
In hindsight, I probably should've ordered the +.020 pistons and just accepted I was going to need to run the block to the machine-shop to have it bored out. Ah well.
(Text-heavy ramble to follow. I have other pictures, just can't be bothered fishing them out when it's just gone past midnight...)

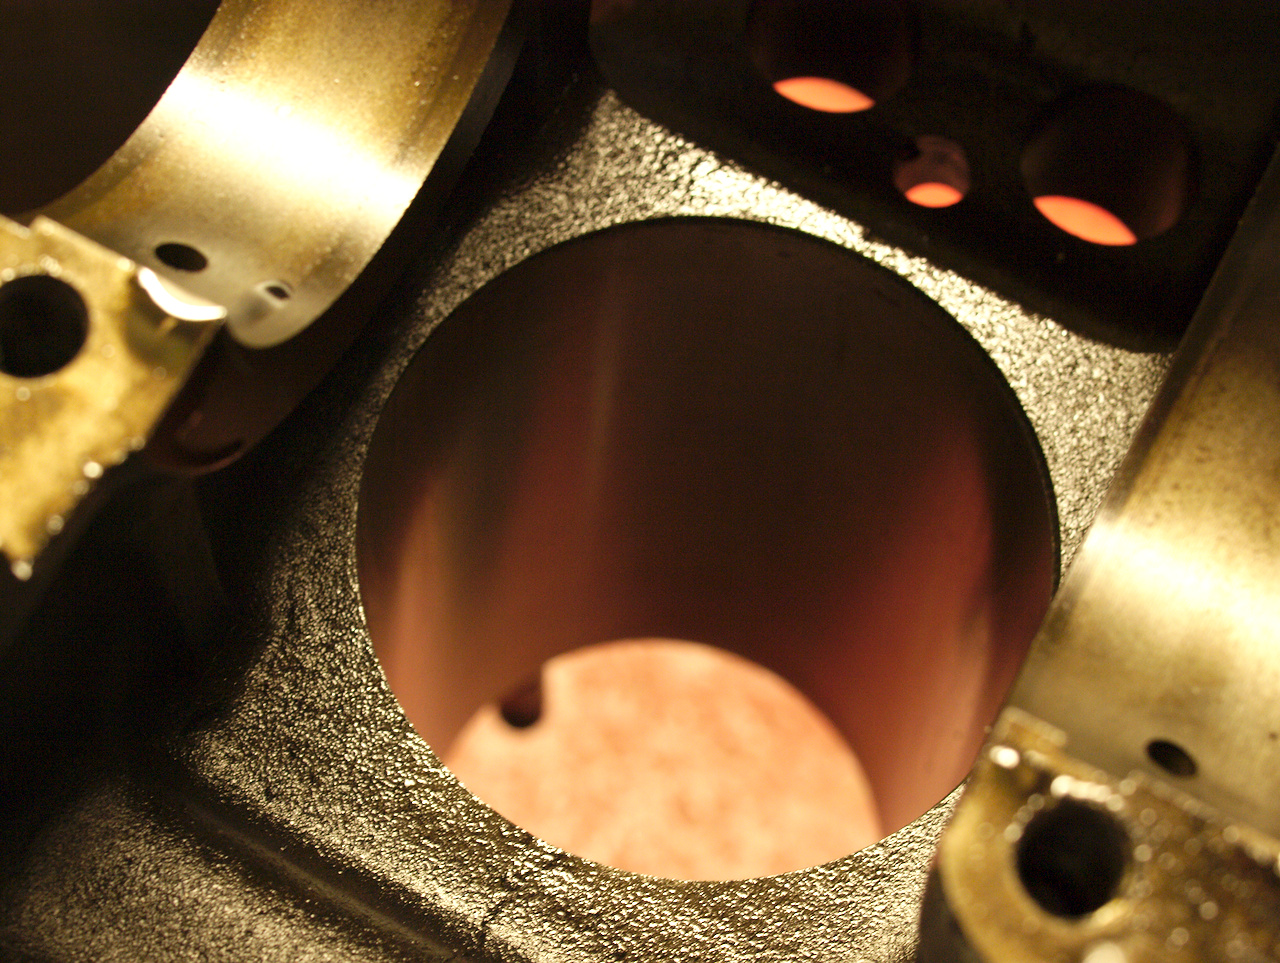
...Doesn't look like there's any liners there, to me. Right, continuing on with the previous plan, then: Going to see how much of that scoring I can hone out without taking it so far I can't just use these standard-bore pistons & rings, rebuild the engine as I currently have it, get a set of +20 pistons for future stock once I've got the money spare and then when the time comes for the next rebuild I'll have the block punched out to +20.
I've got a new rope seal on order (...I am considering, when that
future rebuild comes and the block ends up at the machine-shop, having
it also machined to take a two-part modern-style rear-main seal, if I
can find anything that fits the right dimensions.), which I am not
looking forward to fitting. Too many horror stories about building up
an engine with a rope main-seal, and having it leak afterwards. 
(To be fair, that's not uncommon even with modern seals. Cue muttered
imprecations in the general direction of a Cummins in an Iveco, that
has had 3 rear main-seals in two weeks...  Seal is 2 parts, one that's a press-fit on
the crank, which runs in the other part of the seal that is
press-fit into the timing case. And you have to drive them both in at
the same time, which is very easy to screw up.)
Seal is 2 parts, one that's a press-fit on
the crank, which runs in the other part of the seal that is
press-fit into the timing case. And you have to drive them both in at
the same time, which is very easy to screw up.)
I've torn the oil pump down, and it looks to be all good inside; there's a little wear, but nothing out of the ordinary and the clearances seem entirely reasonable. The pickup separates from the pump body with only a little swearing, and I think I have a plan for changing the pickup to use a front-sump pan instead; I also have a rough drawing for a front-sump pan, that I should be able to make up & tack together, then take to someone I trust to weld it all up oil-tight.
Also, a good pile of stuff has built up now... Material marked out for manifold flanges, set of cam bearings, the pistons and whatnot, various bits n pieces for the fuel-injection setup (Coil-pack, throttle-body, idle air valve, various plugs, and that sort of stuff.) Haven't fully decided on what direction I'm going to go with the manifolds, yet, but as long as I have the flanges then I'm at least making progress on that front. I foresee a lot of drilling, grinding, and filing in the future. (Particularly of the stainless for the exhaust flanges! Ouch!)
While I've been a bit down on enthusiasm, I've started a touch of
painting. Getting one of the front wings in yellow, and it's going
okay. Started off painting it with a brush (because people keep
telling me I can't do it with a brush! ) and
determined to finish it that way, but it's slow going. Looks good as
the coats build up, though.